In this assignment, I implemented a cloth simulation using a mass-spring model, where point masses are interconnected by structural, shearing, and bending springs to simulate realistic cloth behavior. I explored the effects of different constraints on the cloth's wireframe structure, observing how each type of constraint contributes to the overall stability and flexibility of the cloth. Through this process, I learned about the intricate balance between computational efficiency and physical realism in simulations, as well as the importance of visualizing underlying structures to understand complex systems.
Part 1: Masses and Springs
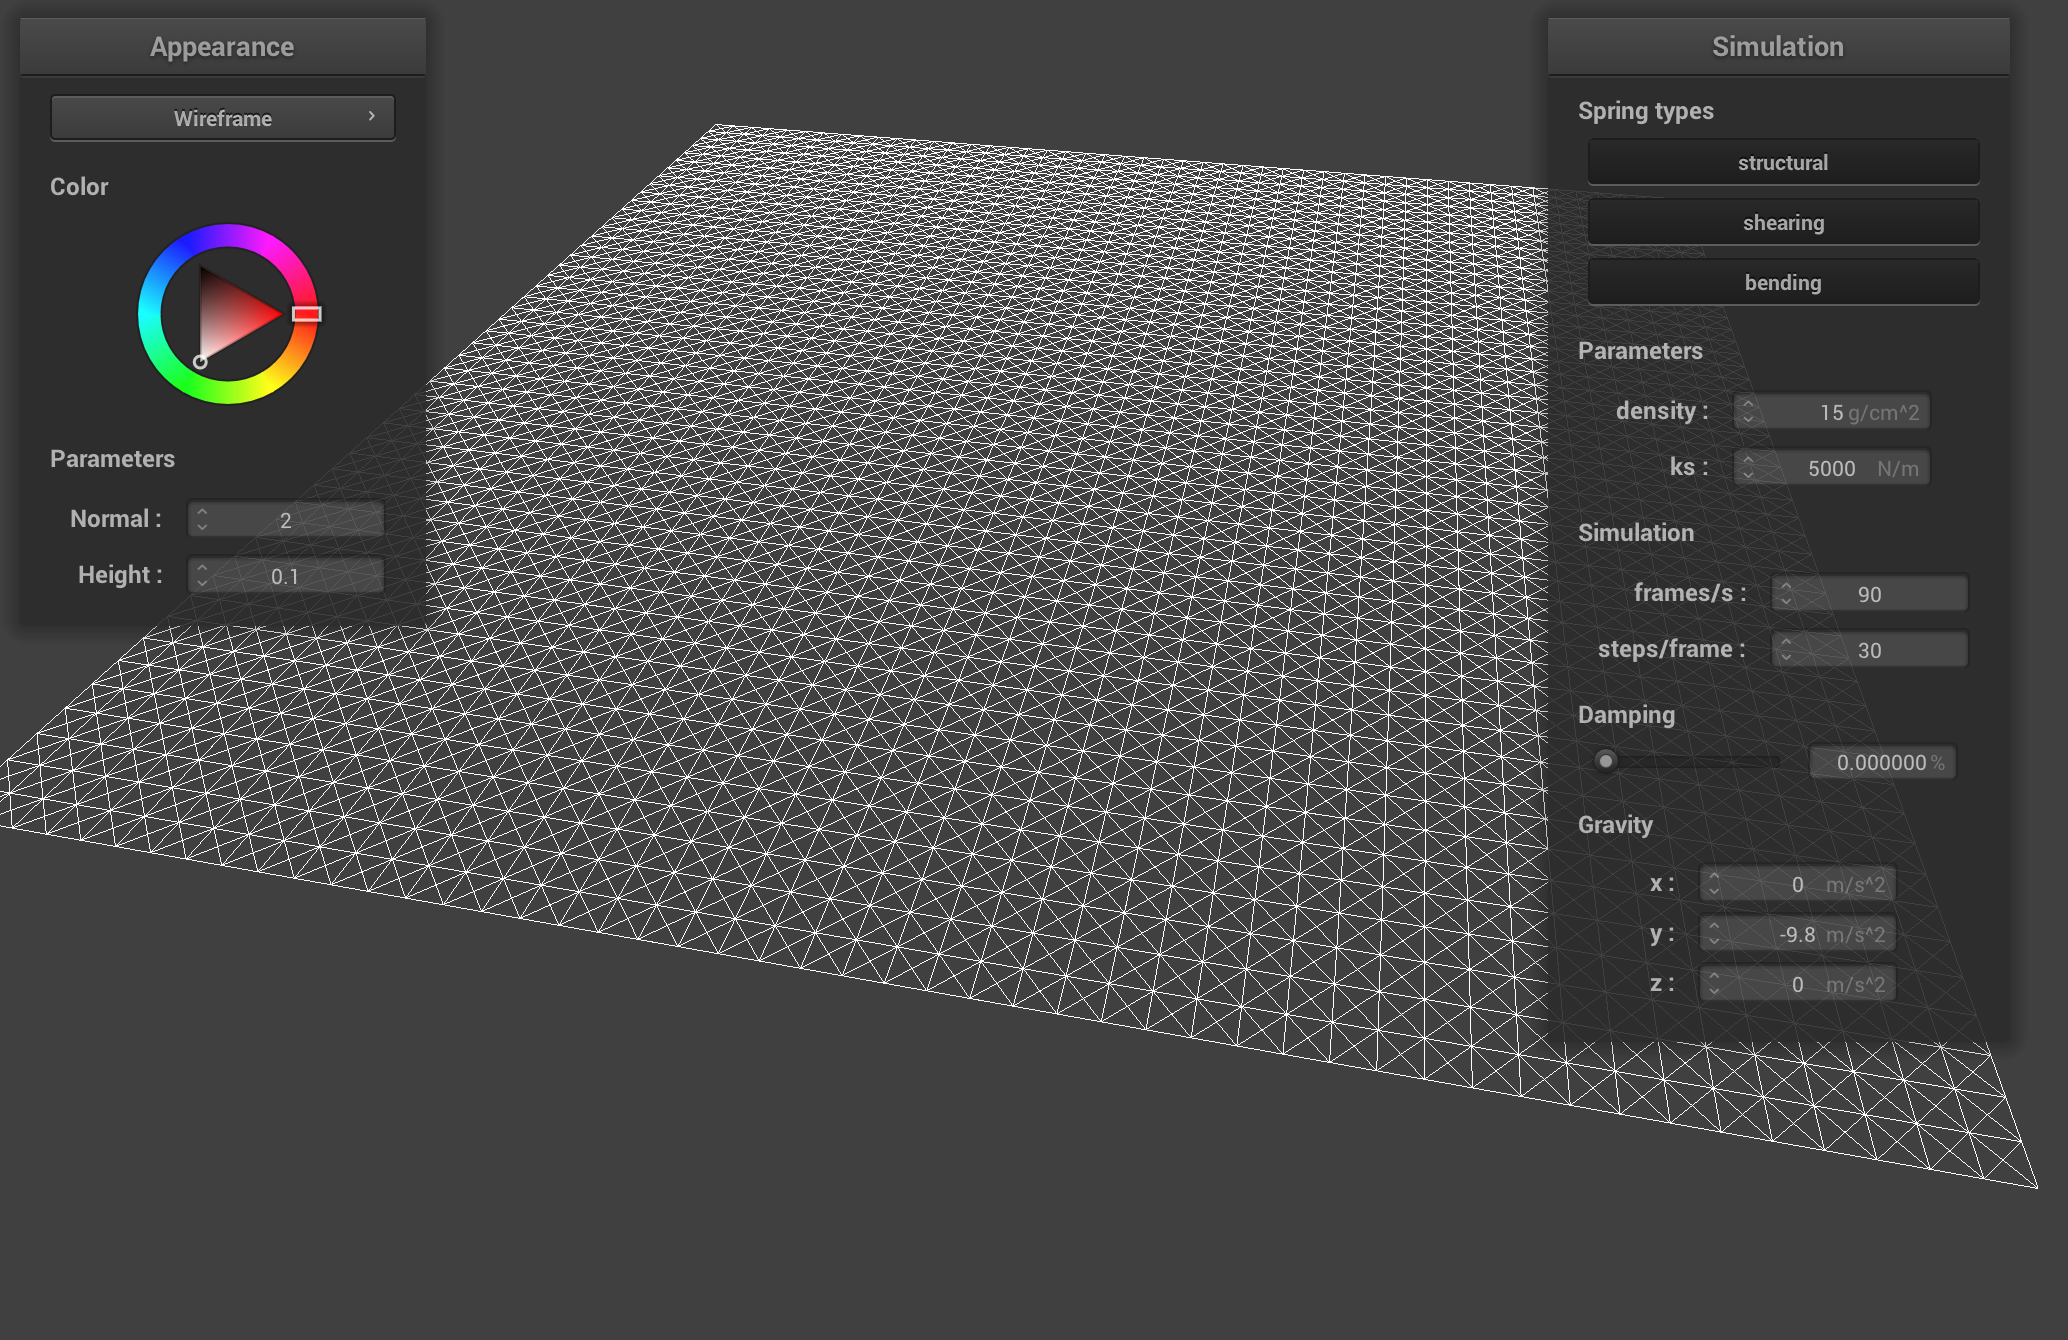
1. Take some screenshots of scene/pinned2.json from a viewing angle where you can clearly see the cloth wireframe to show the structure of your point masses and springs.
Wireframe Structure
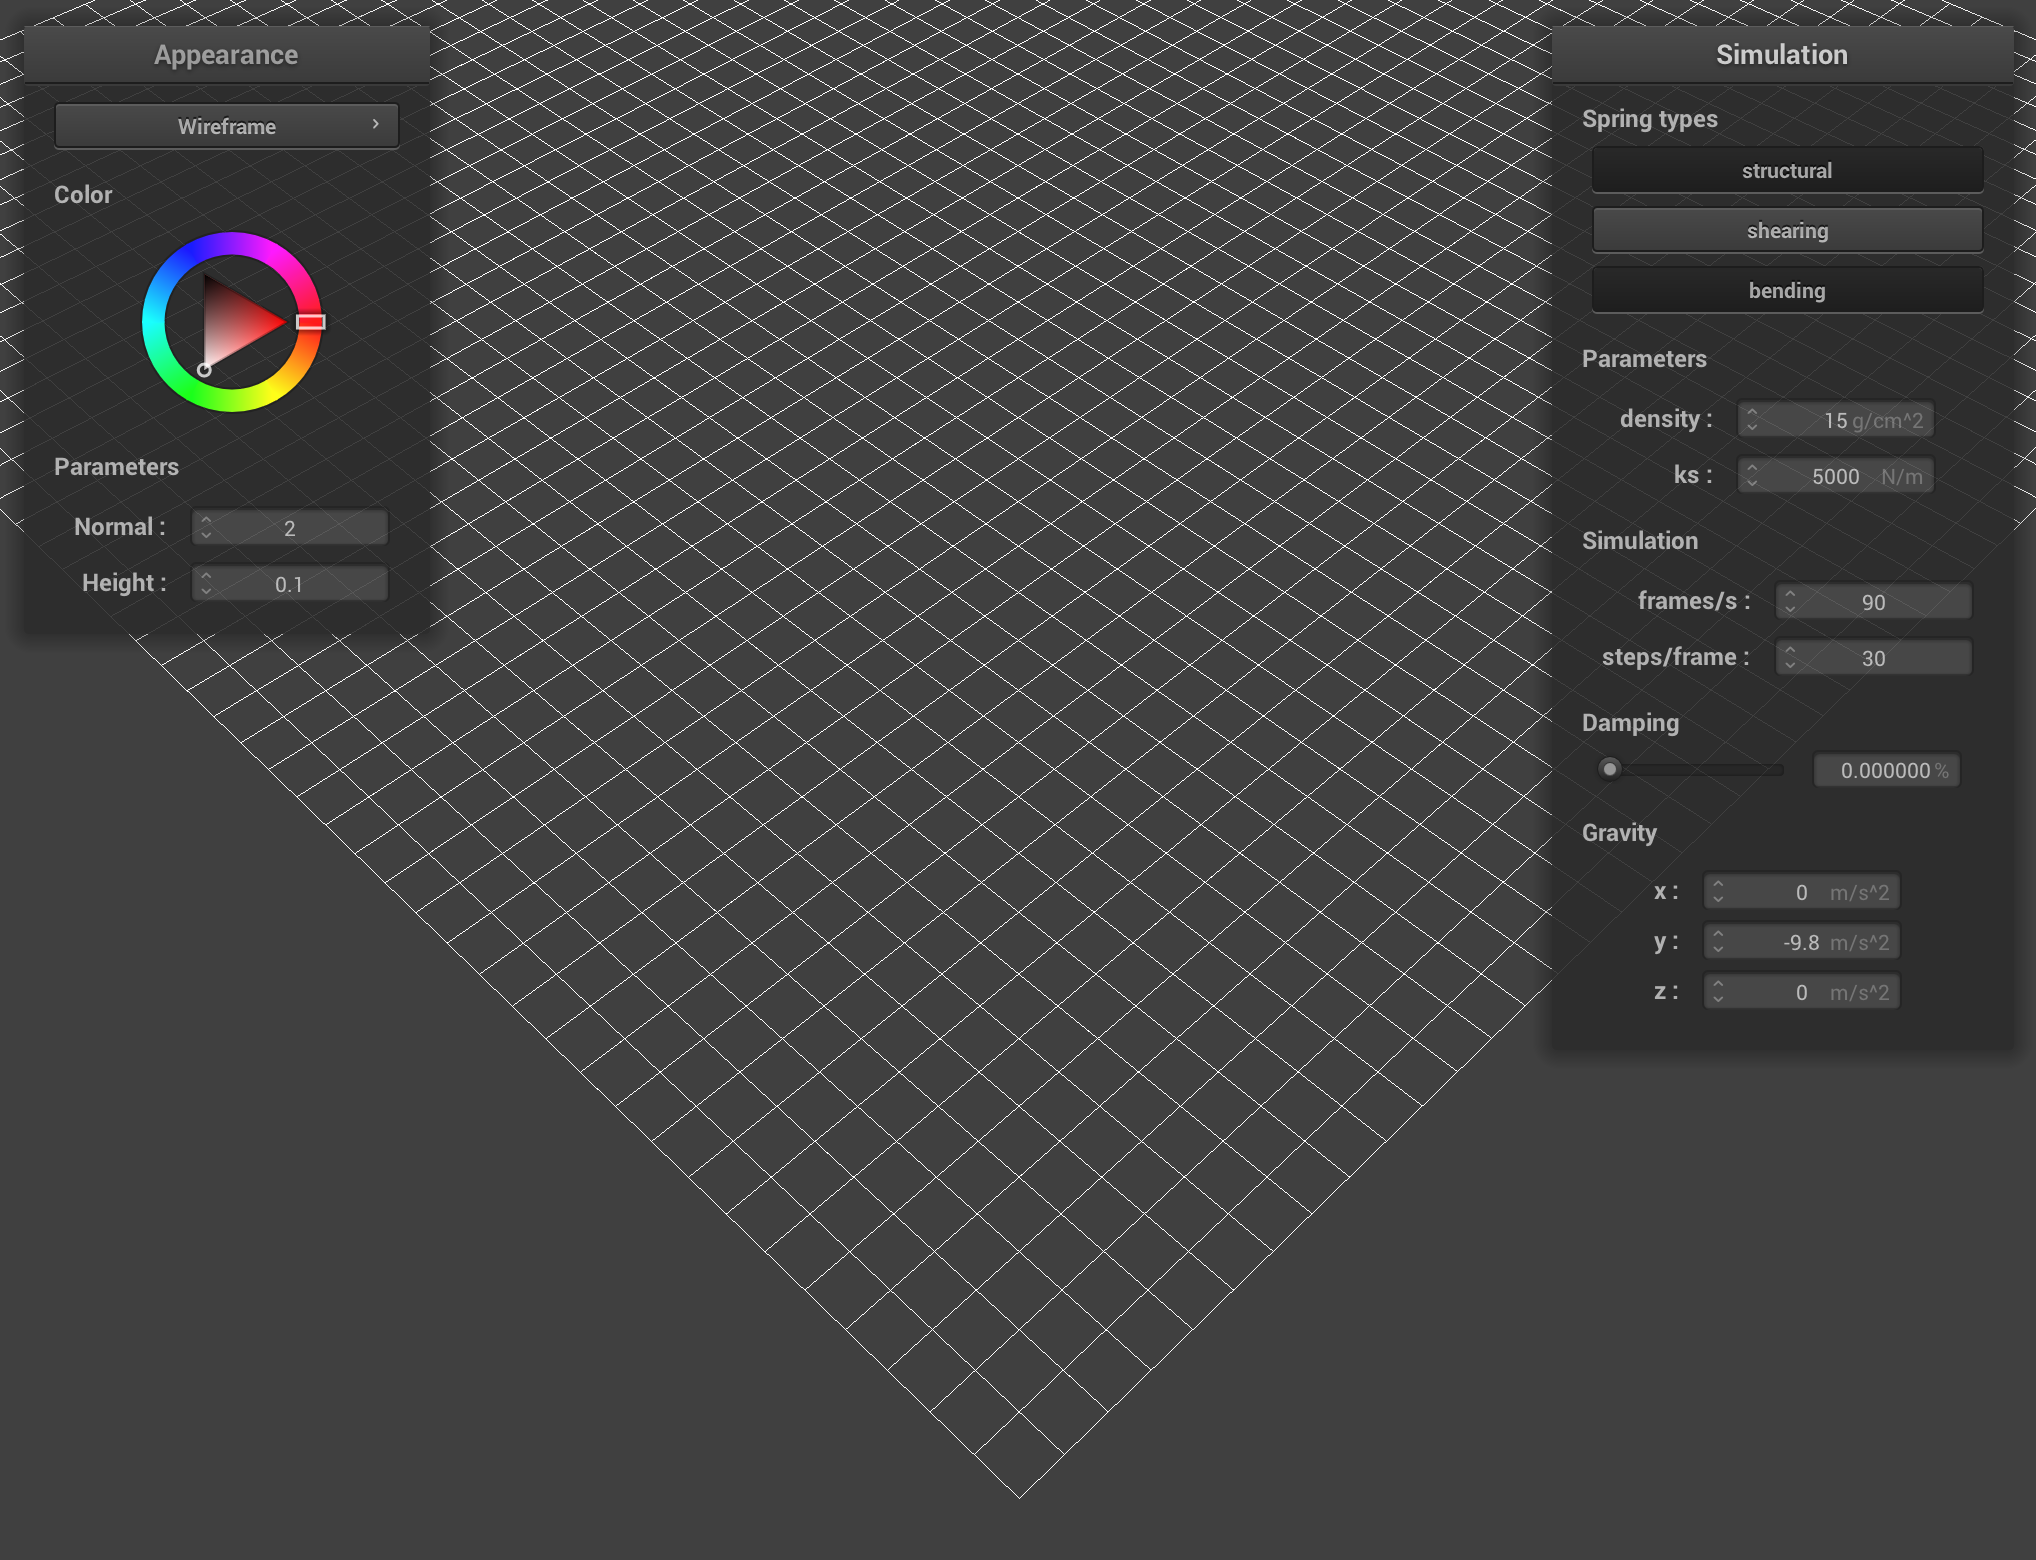
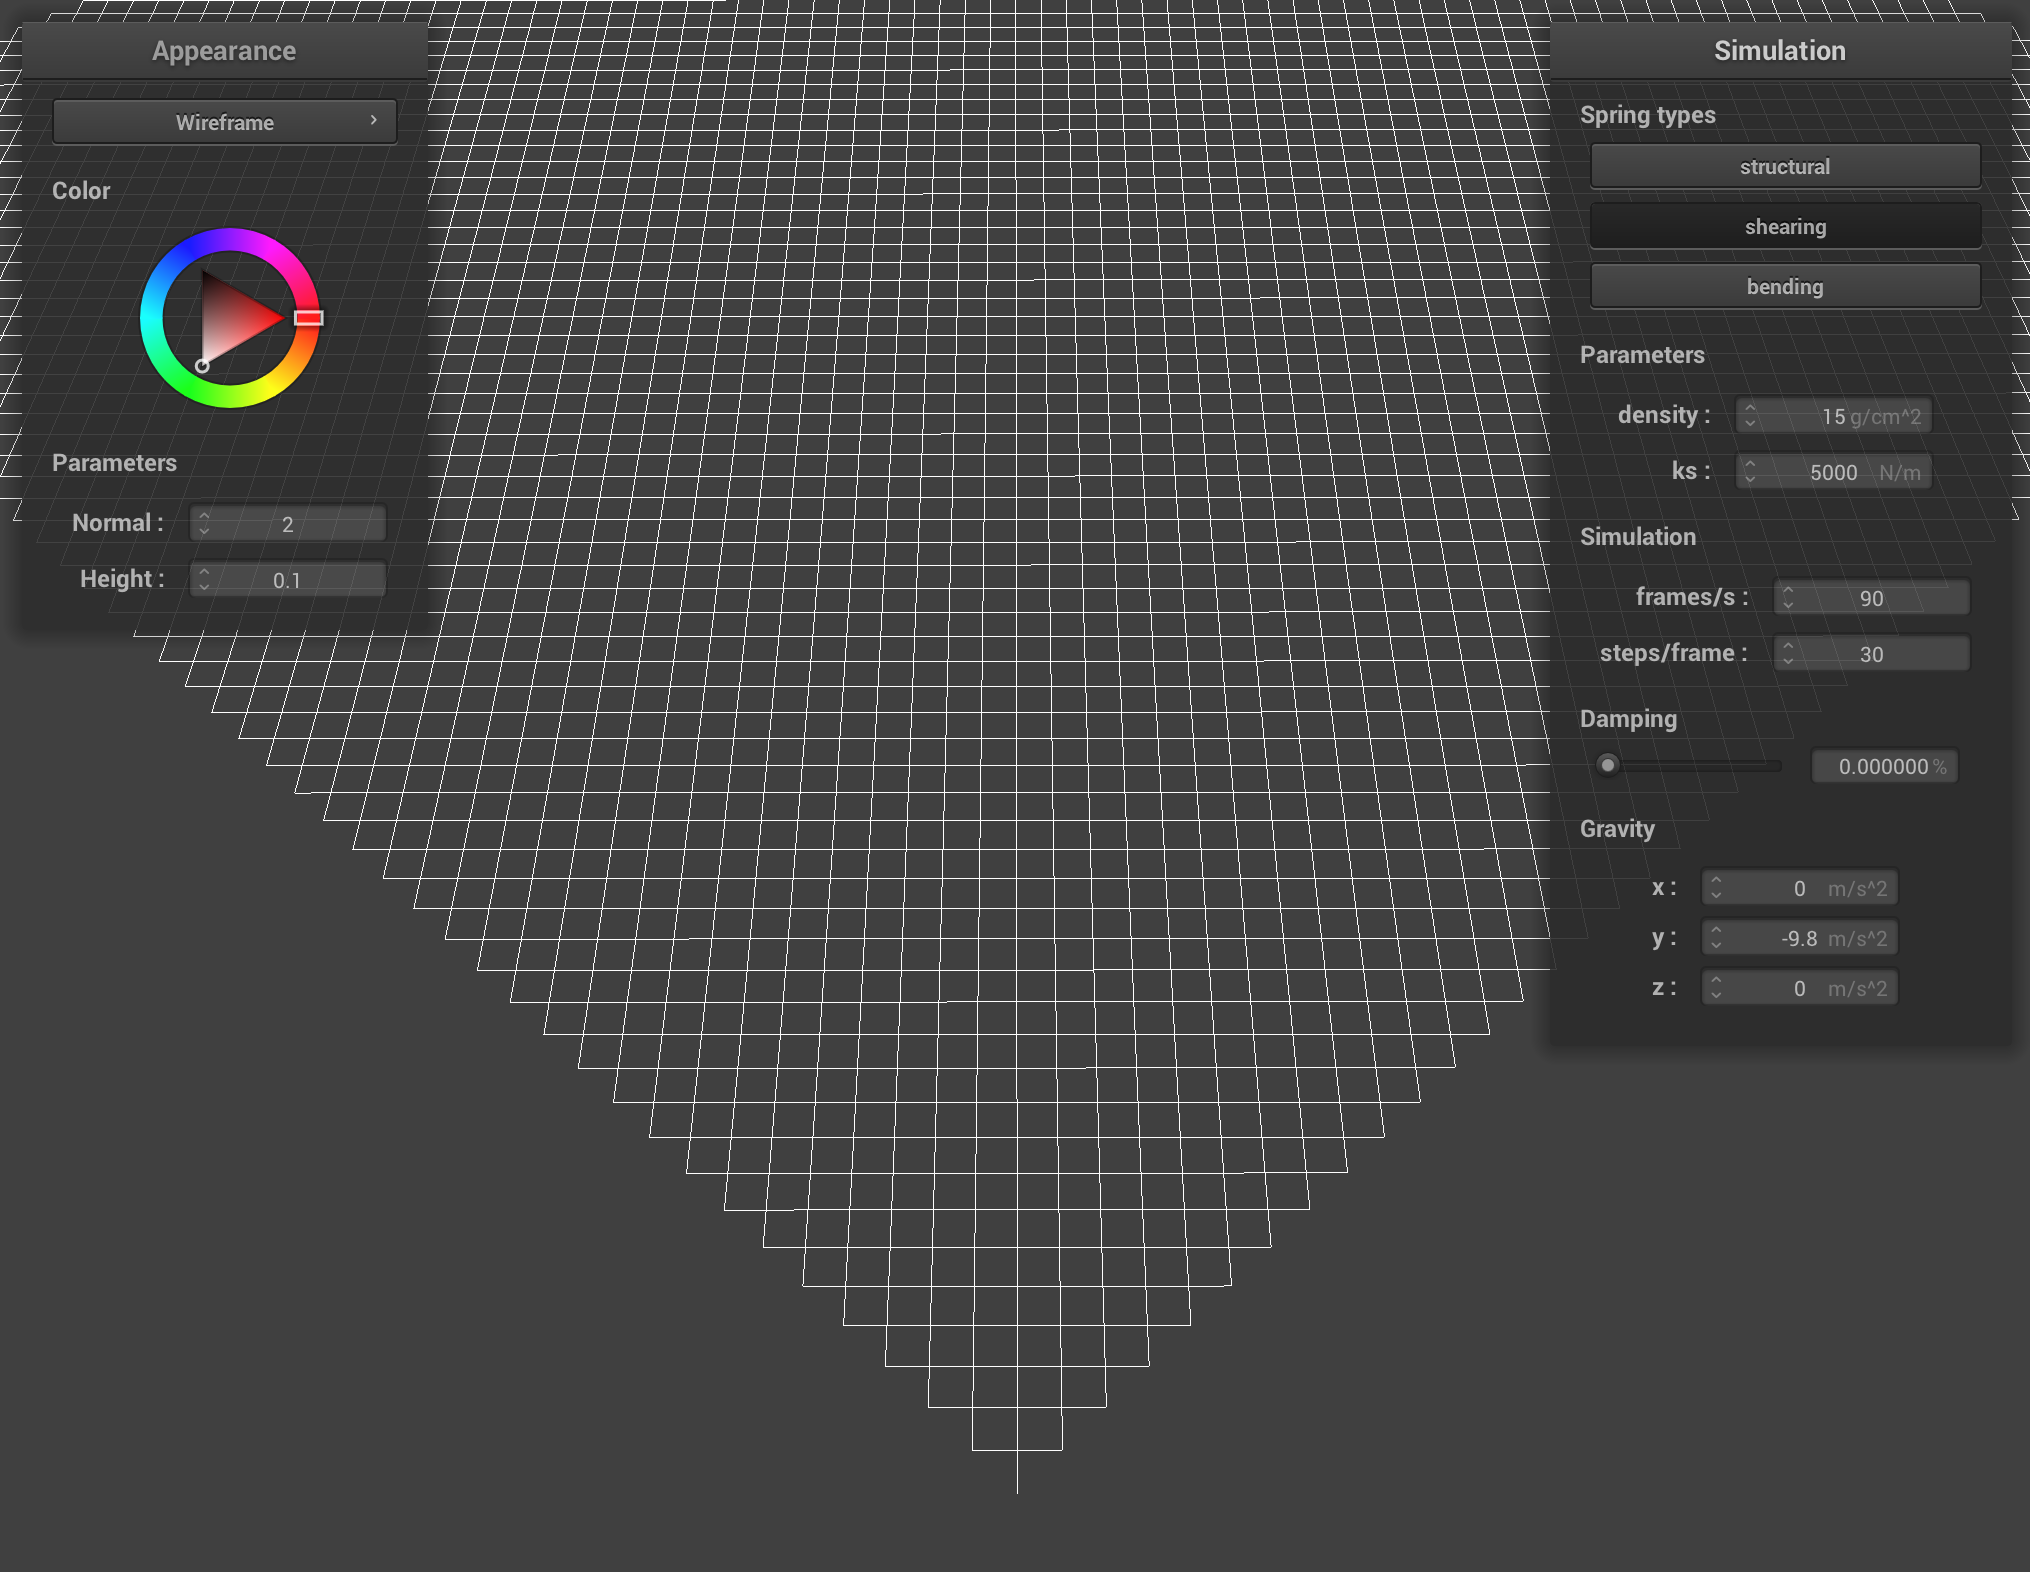
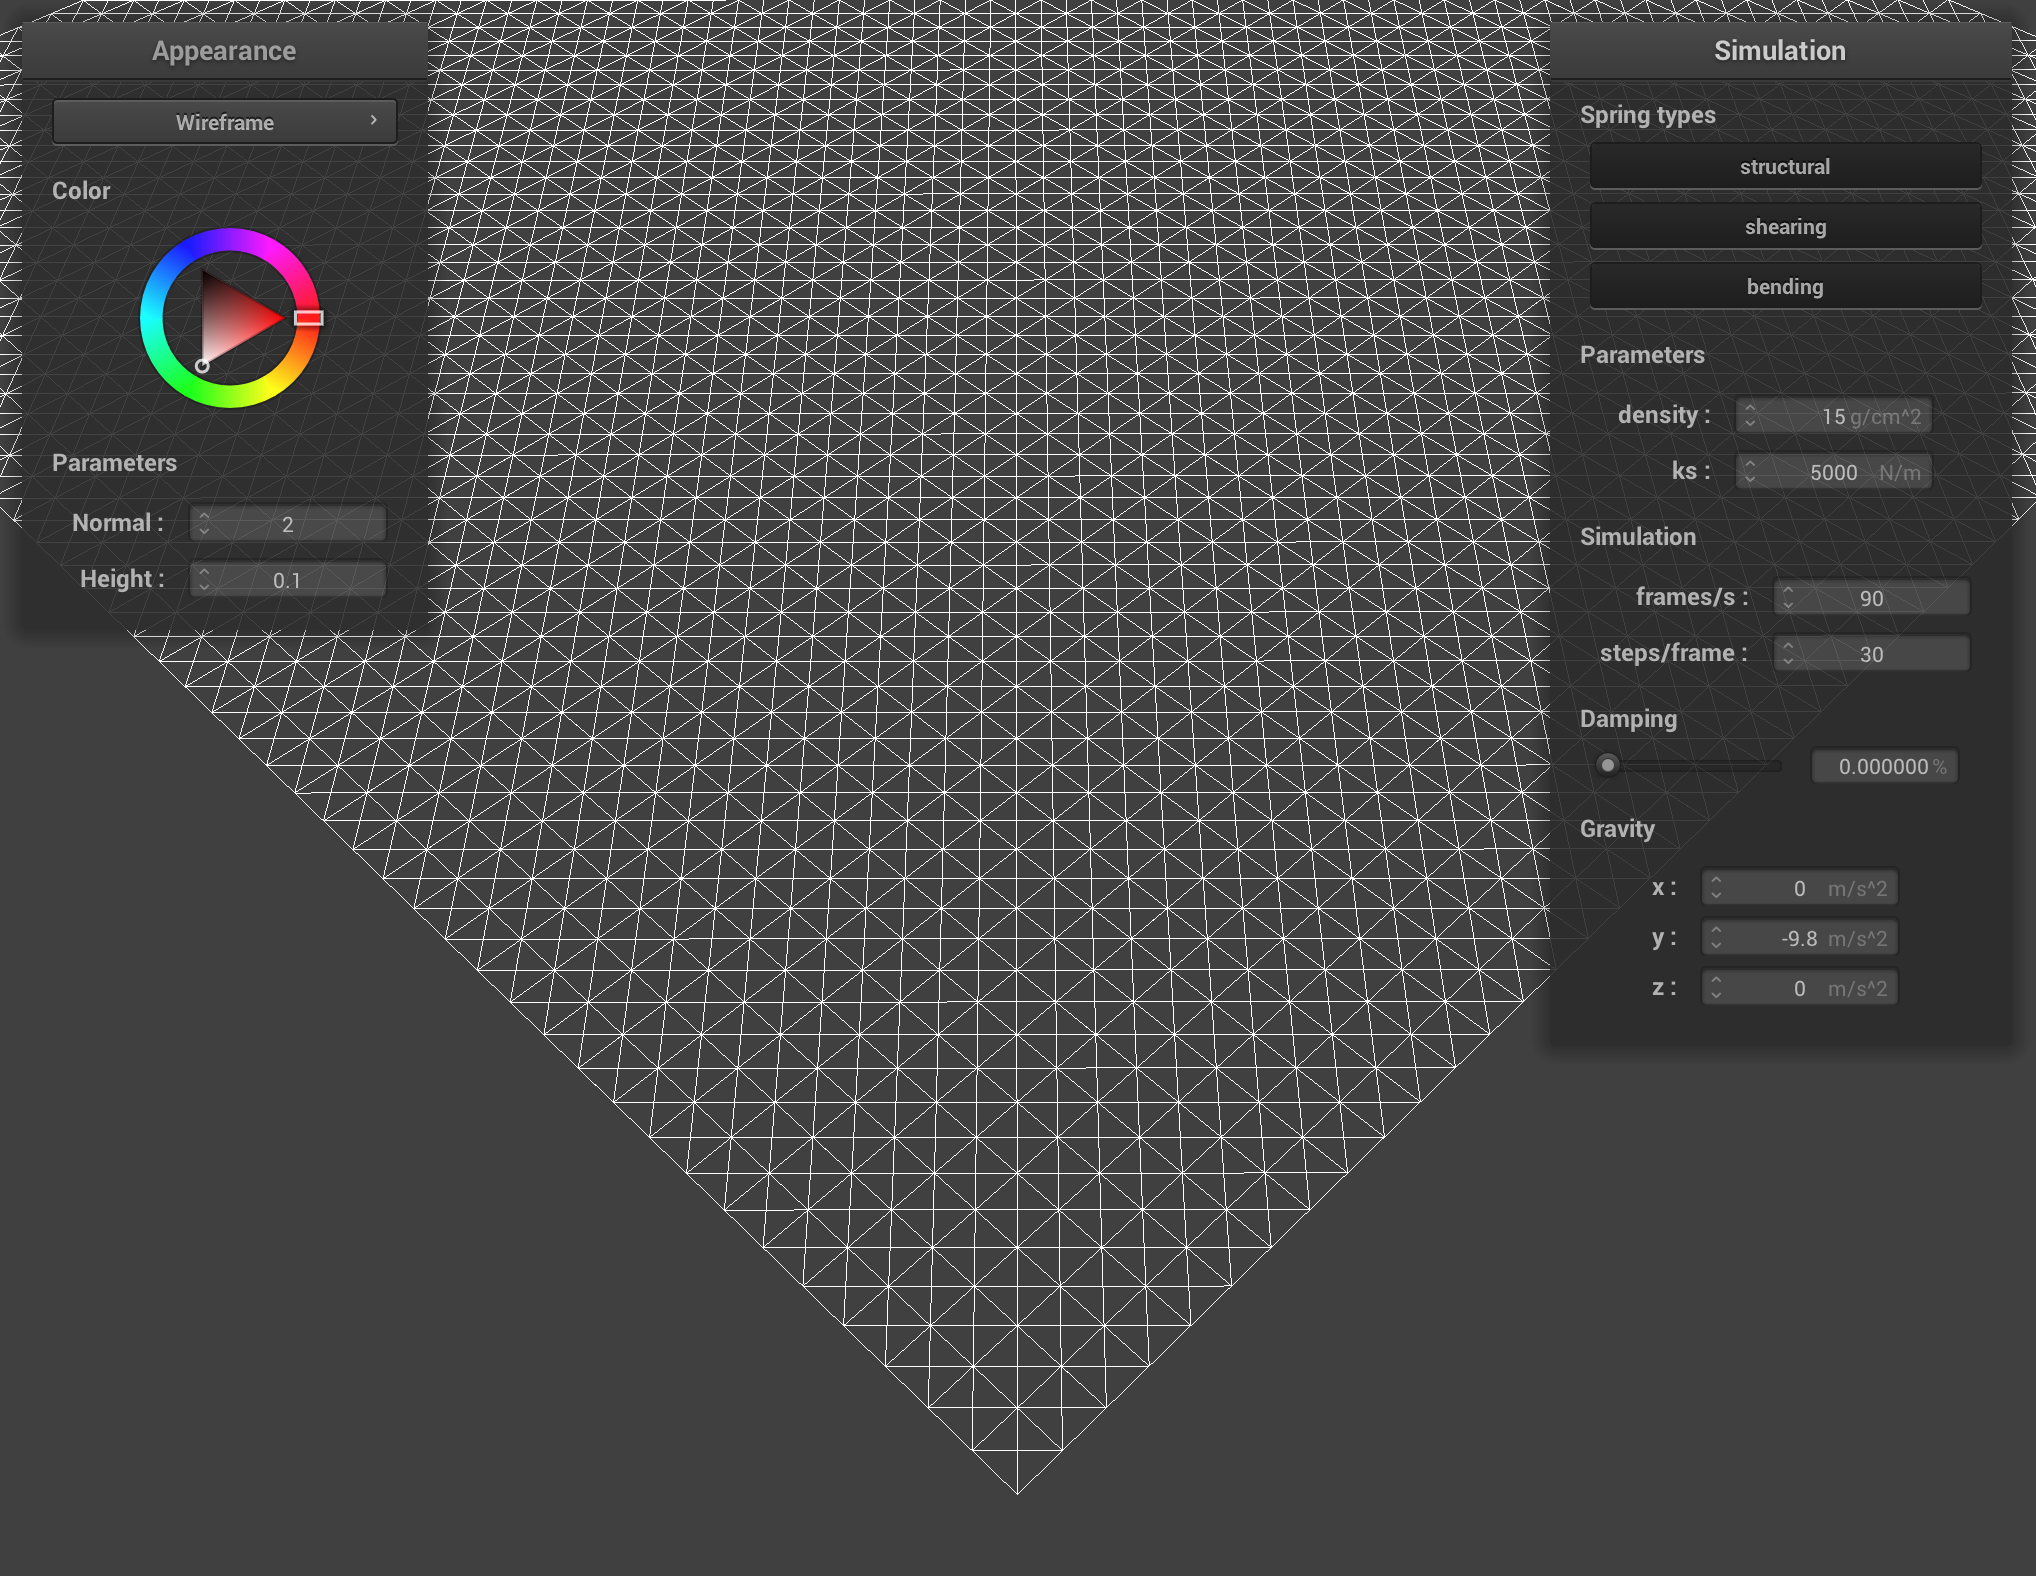
2. Show us what the wireframe looks like (1) without any shearing constraints, (2) with only shearing constraints, and (3) with all constraints.
Wireframe without any shearing constraints
Wireframe with only shearing constraints
Wireframe with all constraints
Part 2: Simulation via Numerical Integration
1. Experiment with some the parameters in the simulation. To do so, pause the simulation at the start with P, modify the values of interest, and then resume by pressing P again. You can also restart the simulation at any time from the cloth's starting position by pressing R.
Describe the effects of changing the spring constant ks; how does the cloth behave from start to rest with a very low ks? A high ks? What about for density? What about for damping? For each of the above, observe any noticeable differences in the cloth compared to the default parameters and show us some screenshots of those interesting differences and describe when they occur.
Spring Constant (ks) Effects
Low ks value: 10
When the spring constant is low, the cloth moves more elastically. There is less tension on the cloth, and it takes longer to settle into a rest position.
High ks value: 10000
When the spring constant is high, the cloth becomes remarkably stiff and rigid. The movement appears more sudden, with the cloth snapping into its final position. The cloth reaches a rest state more quickly.
Density Effects
Low density value: 1 g/cm^2
When the density value is low, the cloth seems to float more lightly. The overall movement appears more delicate.
High density value: 250 g/cm^2
When the density value is high, we have an extremely heavy-looking cloth. It falls very quickly with greater momentum and stretches significantly more under its own weight.
Damping Effects
Low damping value: ~0.02%
When the damping value is low, we see the cloth making very violent oscillations. The cloth appears bouncy, swinging back and forth continuously.
High damping value: 1%
When the damping value is high, we see the cloth fall very slowly into a rest position, but the overall movement appears more elegant and graceful.
When we change these parameters, we can see the most dramatic differences during the initial fall and the first few "swings". The final rest state does still look quite different between extreme parameter values (ex. density).
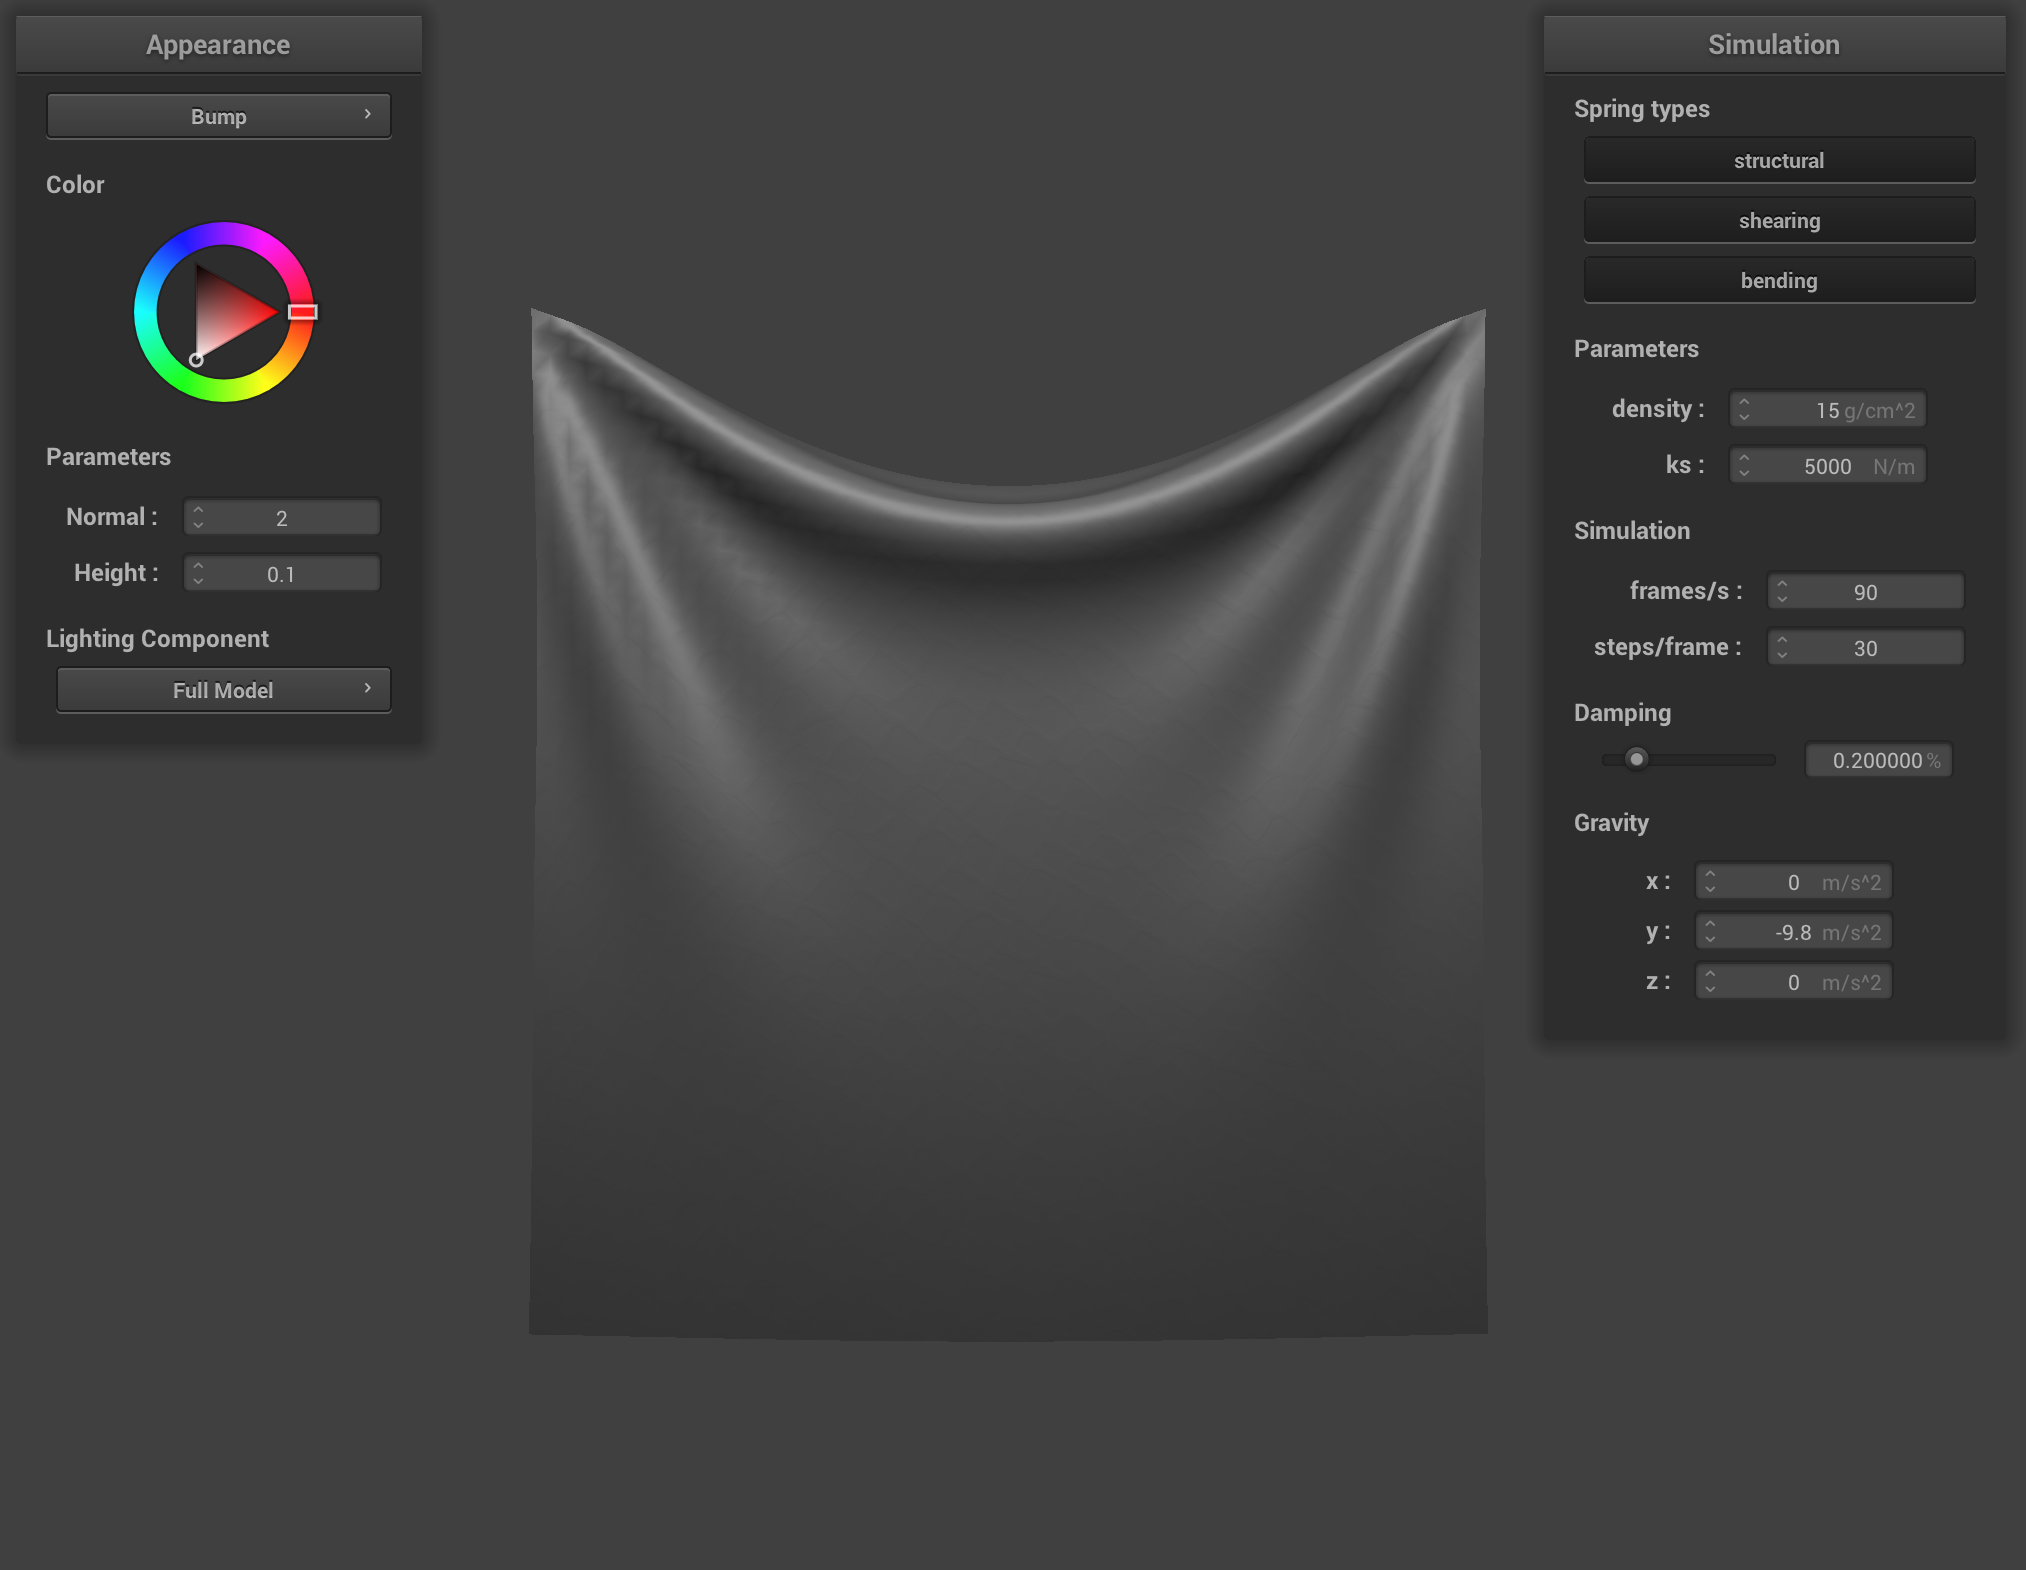
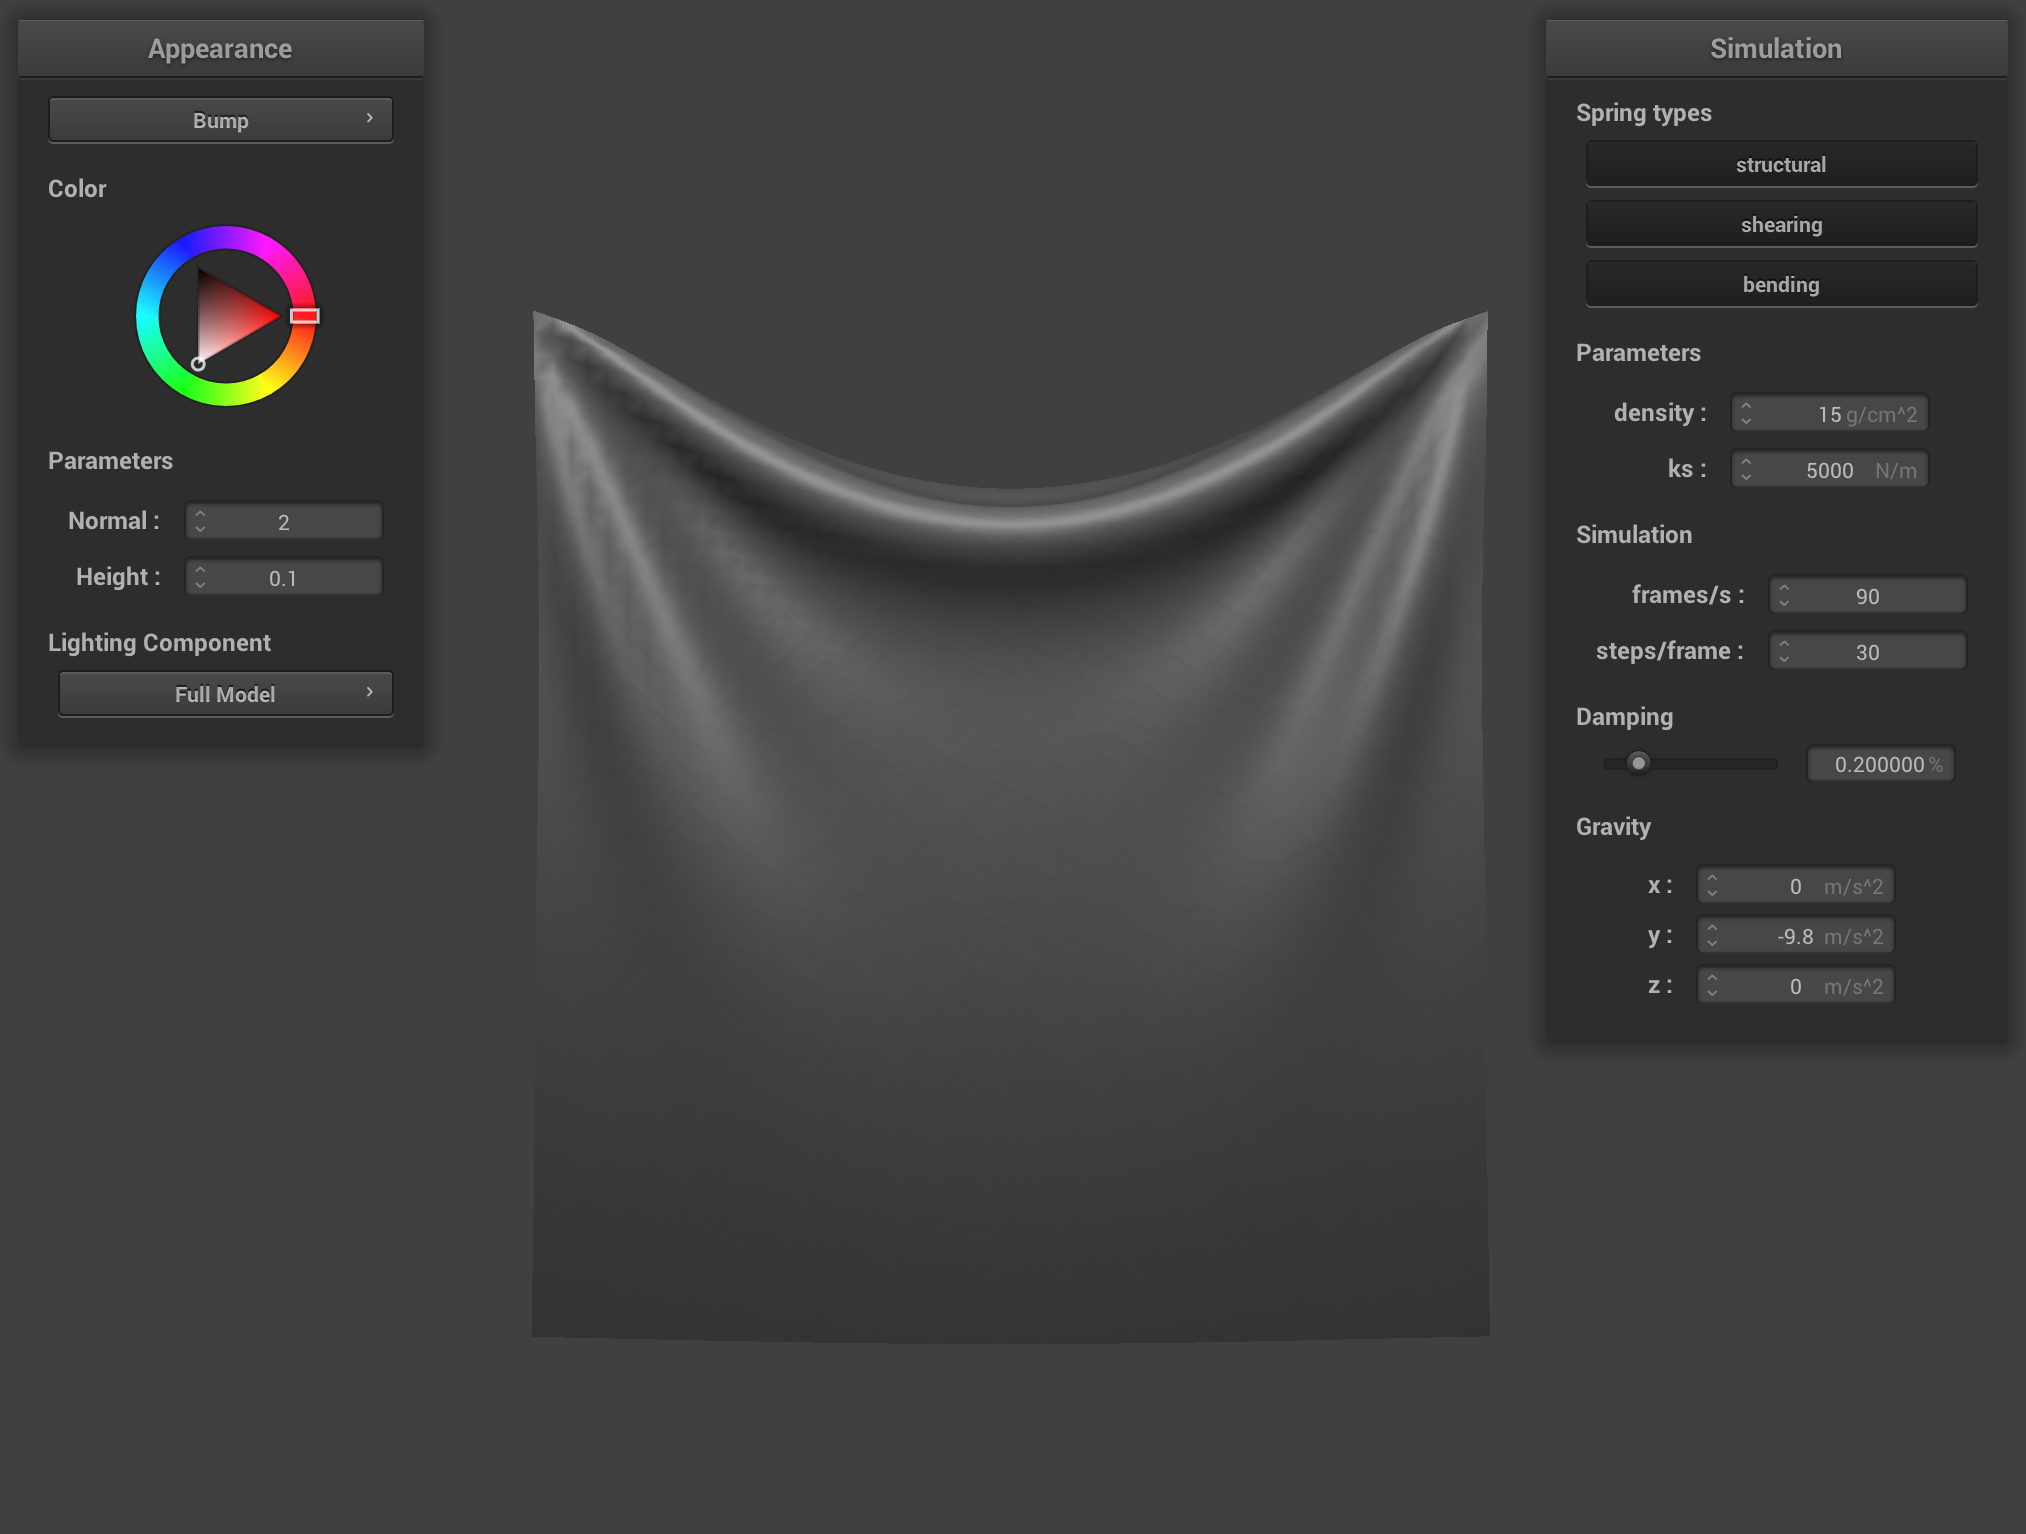
2. Show us a screenshot of your shaded cloth from scene/pinned4.json in its final resting state! If you choose to use different parameters than the default ones, please list them.
Shaded Cloth
Part 3: Handling collisions with other objects
1. Describe your implementation of handling collisions with spheres and planes.
For the sphere collision handling, I implemented a solution that detects when a point mass enters the sphere by checking if the distance between the point and the sphere center is less than the radius.
When this happens, I calculate the tangent point on the sphere's surface by extending a ray from the center through the point mass's position.
Then I compute a correction vector from the point's last position to this tangent point, and apply this correction scaled by (1-friction) to account for the friction between cloth and sphere.
This ensures points stay outside the sphere while preserving the cloth's momentum.
For the plane collision handling, I use signed distances to detect when a point mass has crossed the plane since the last timestep. This occurs when the current signed distance and the previous signed distance have opposite signs (or one is zero).
I then calculated the exact intersection point where the point's trajectory crossed the plane. To prevent the point from exactly resting on the plane (which can cause numerical instability), I add a small offset in the normal direction to ensure the point stays slightly on its original side.
The correction vector is calculated and scaled by (1-friction) to simulate friction with the plane surface.
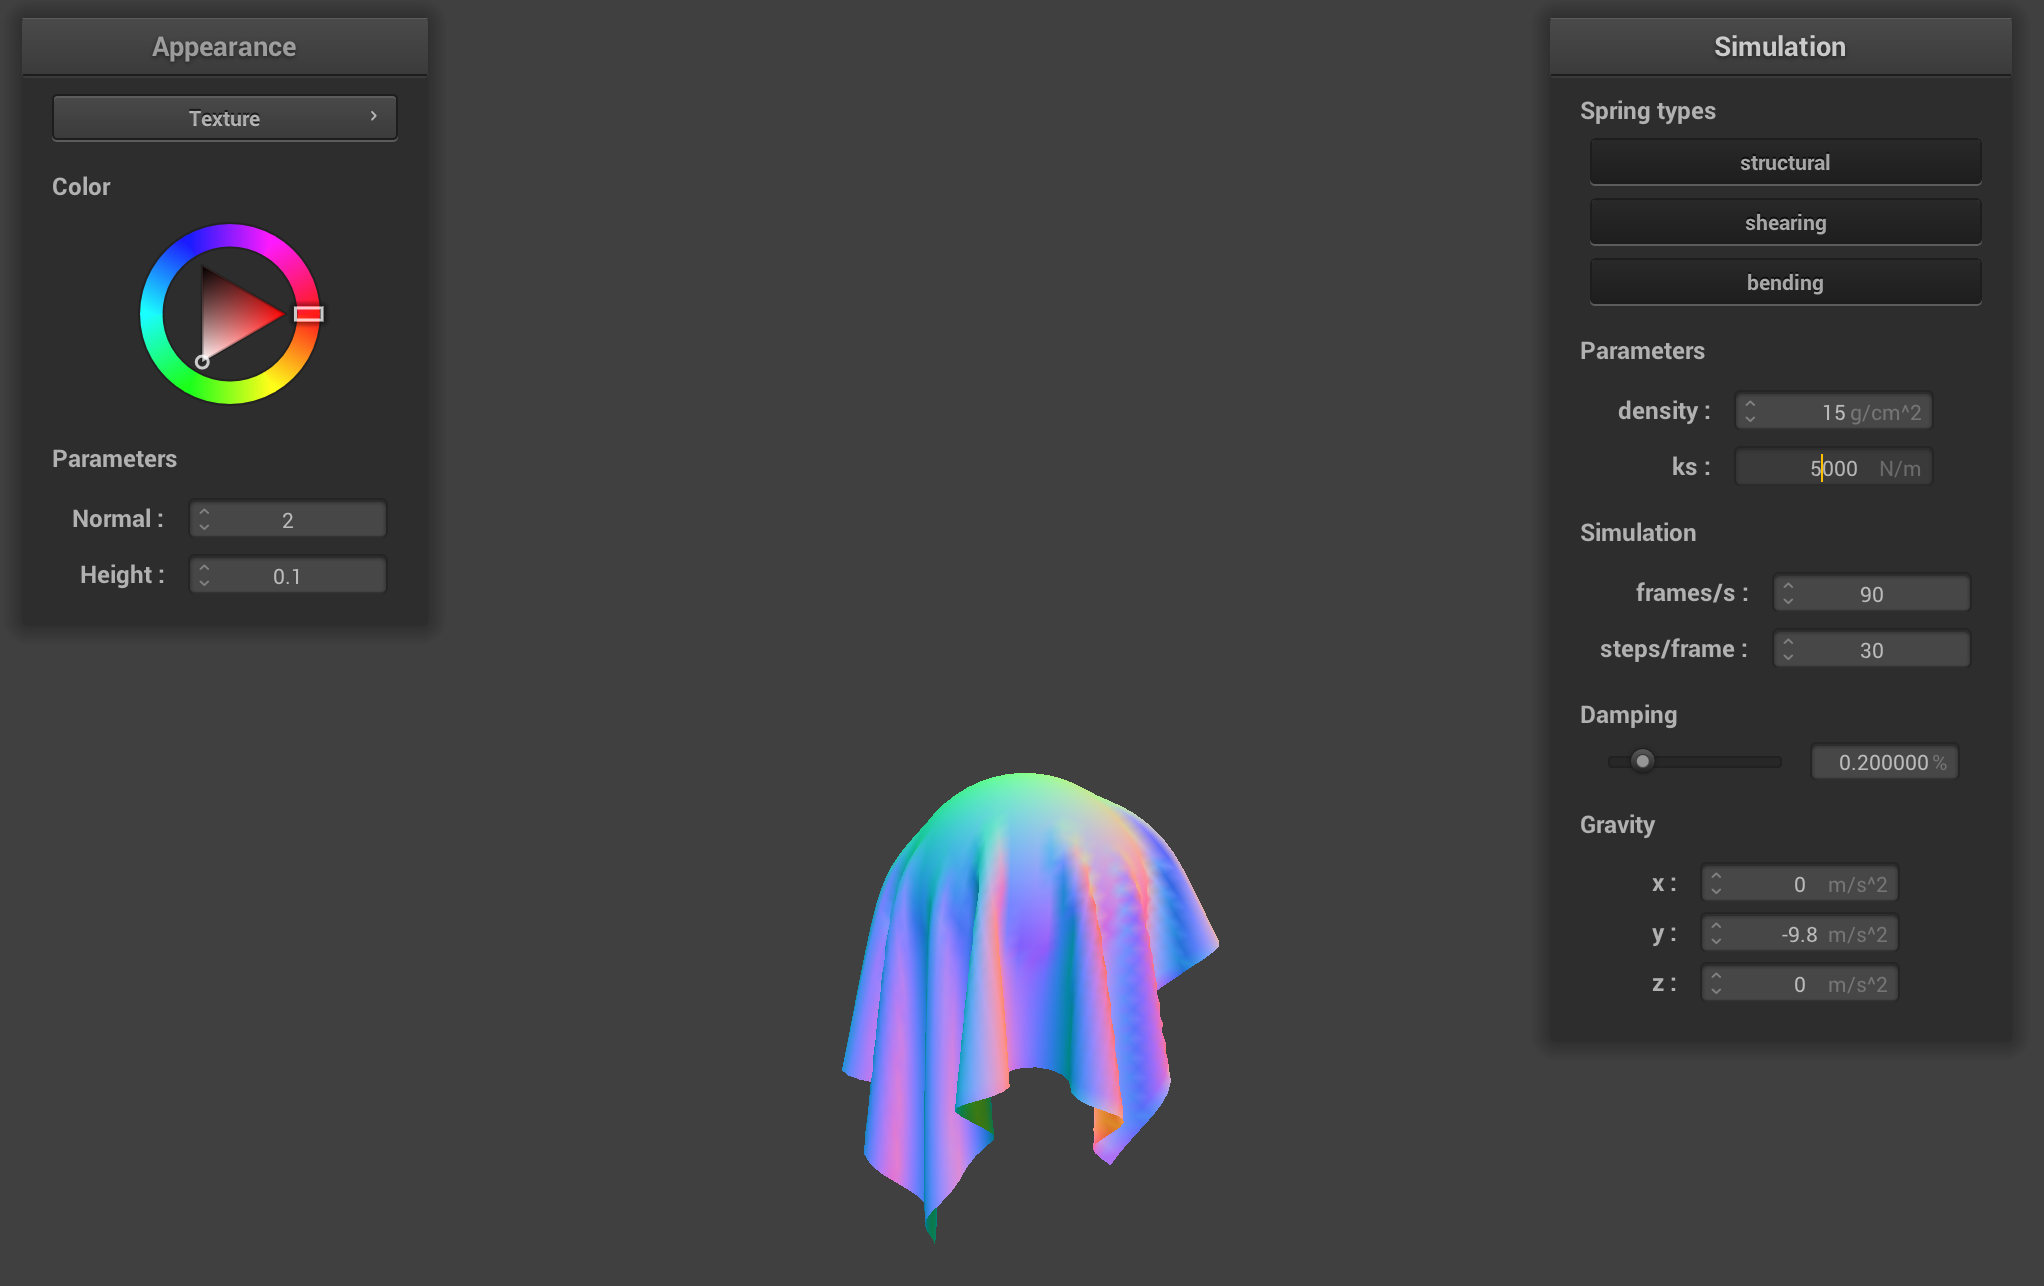
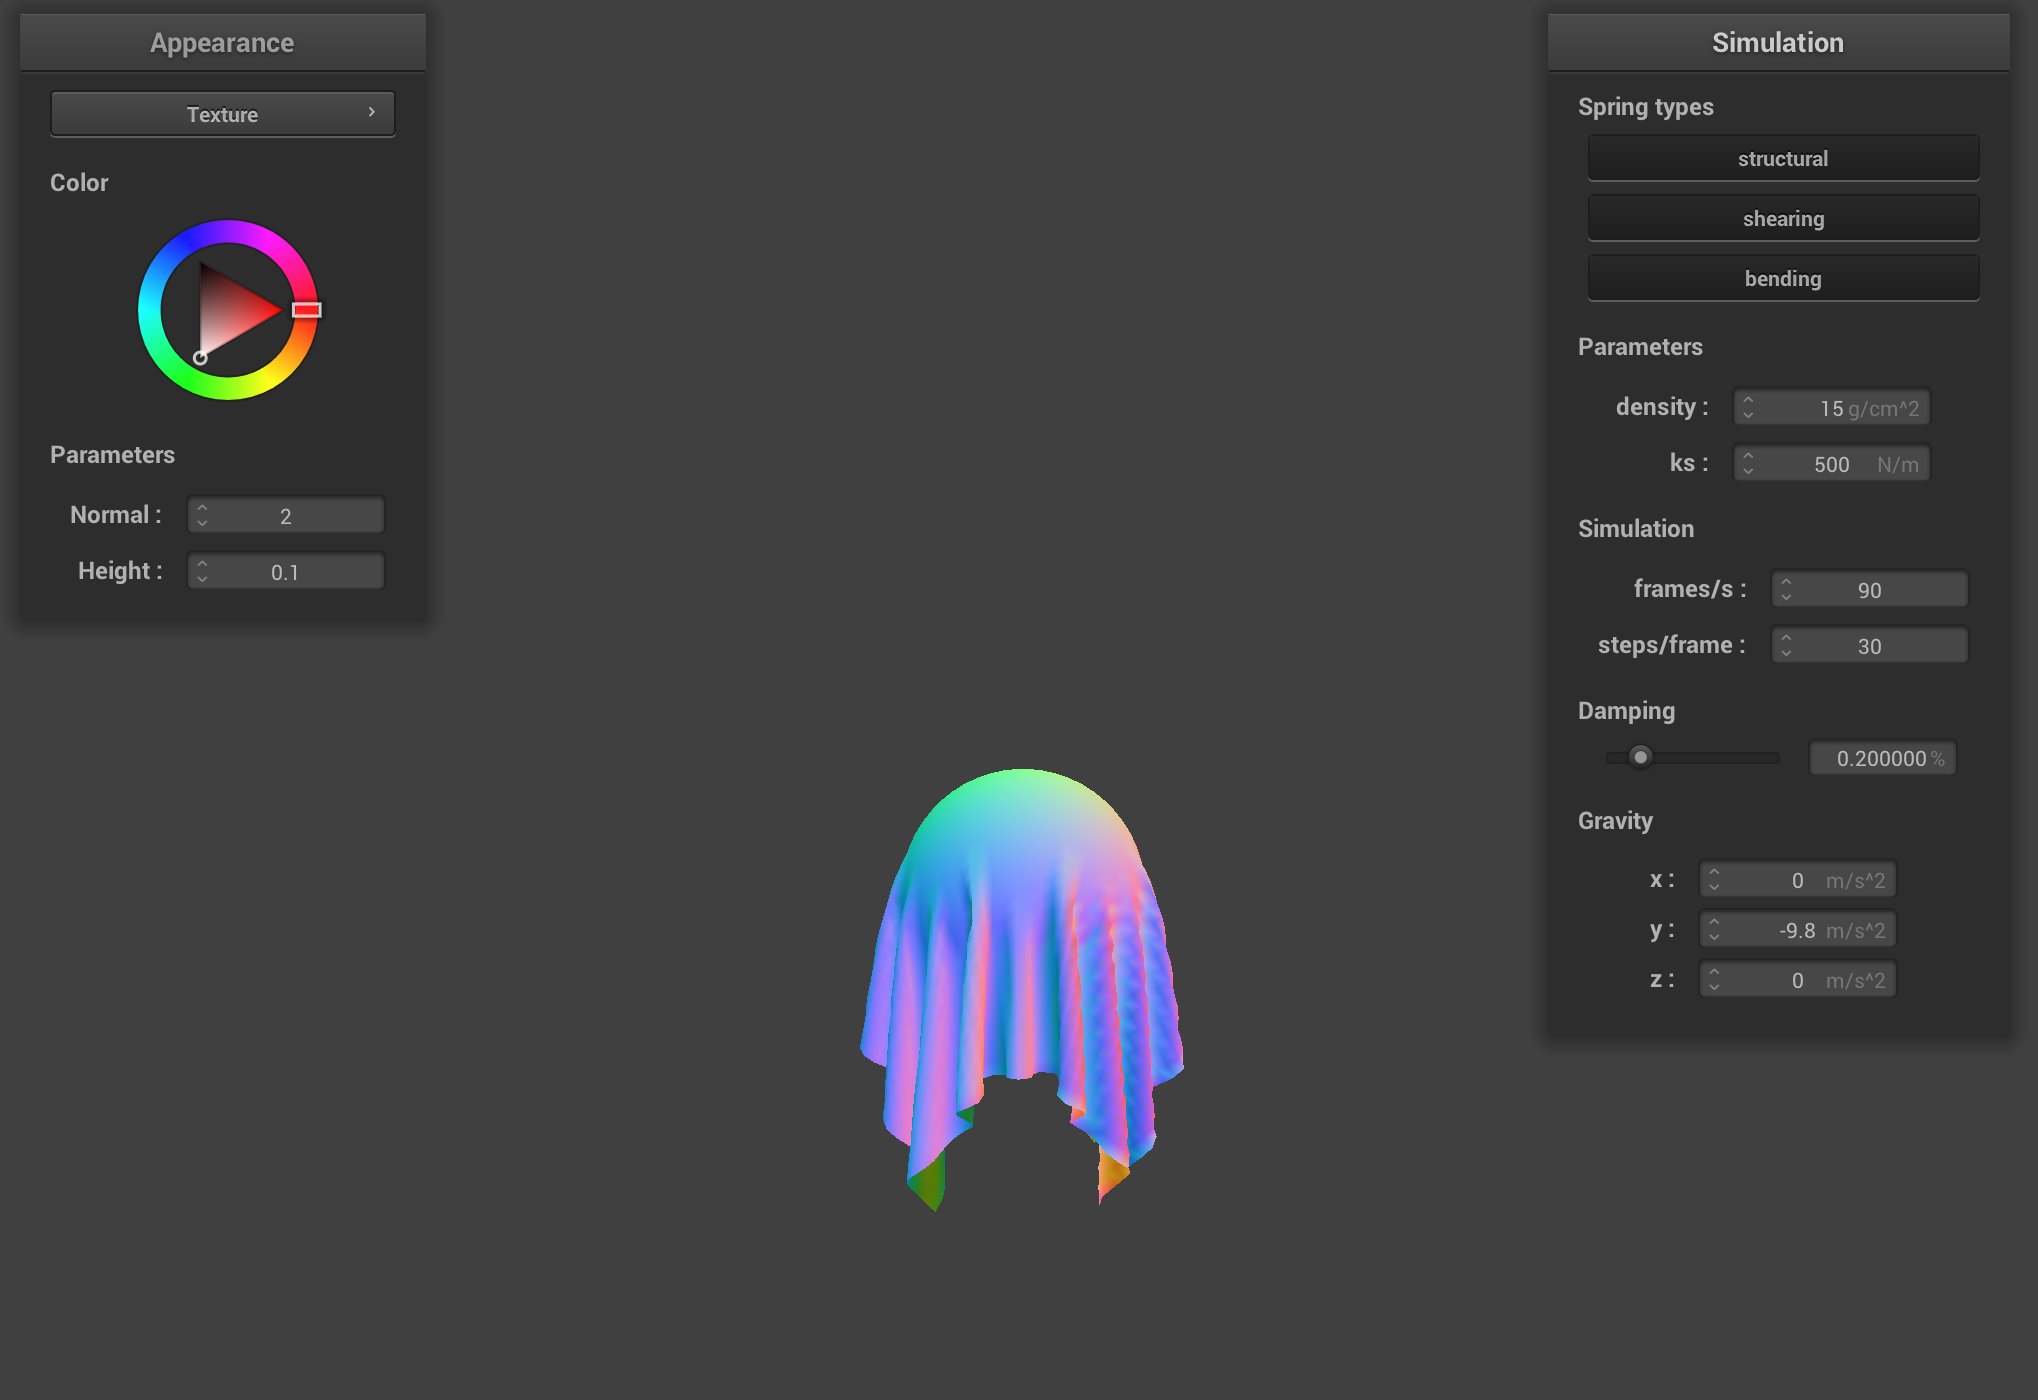
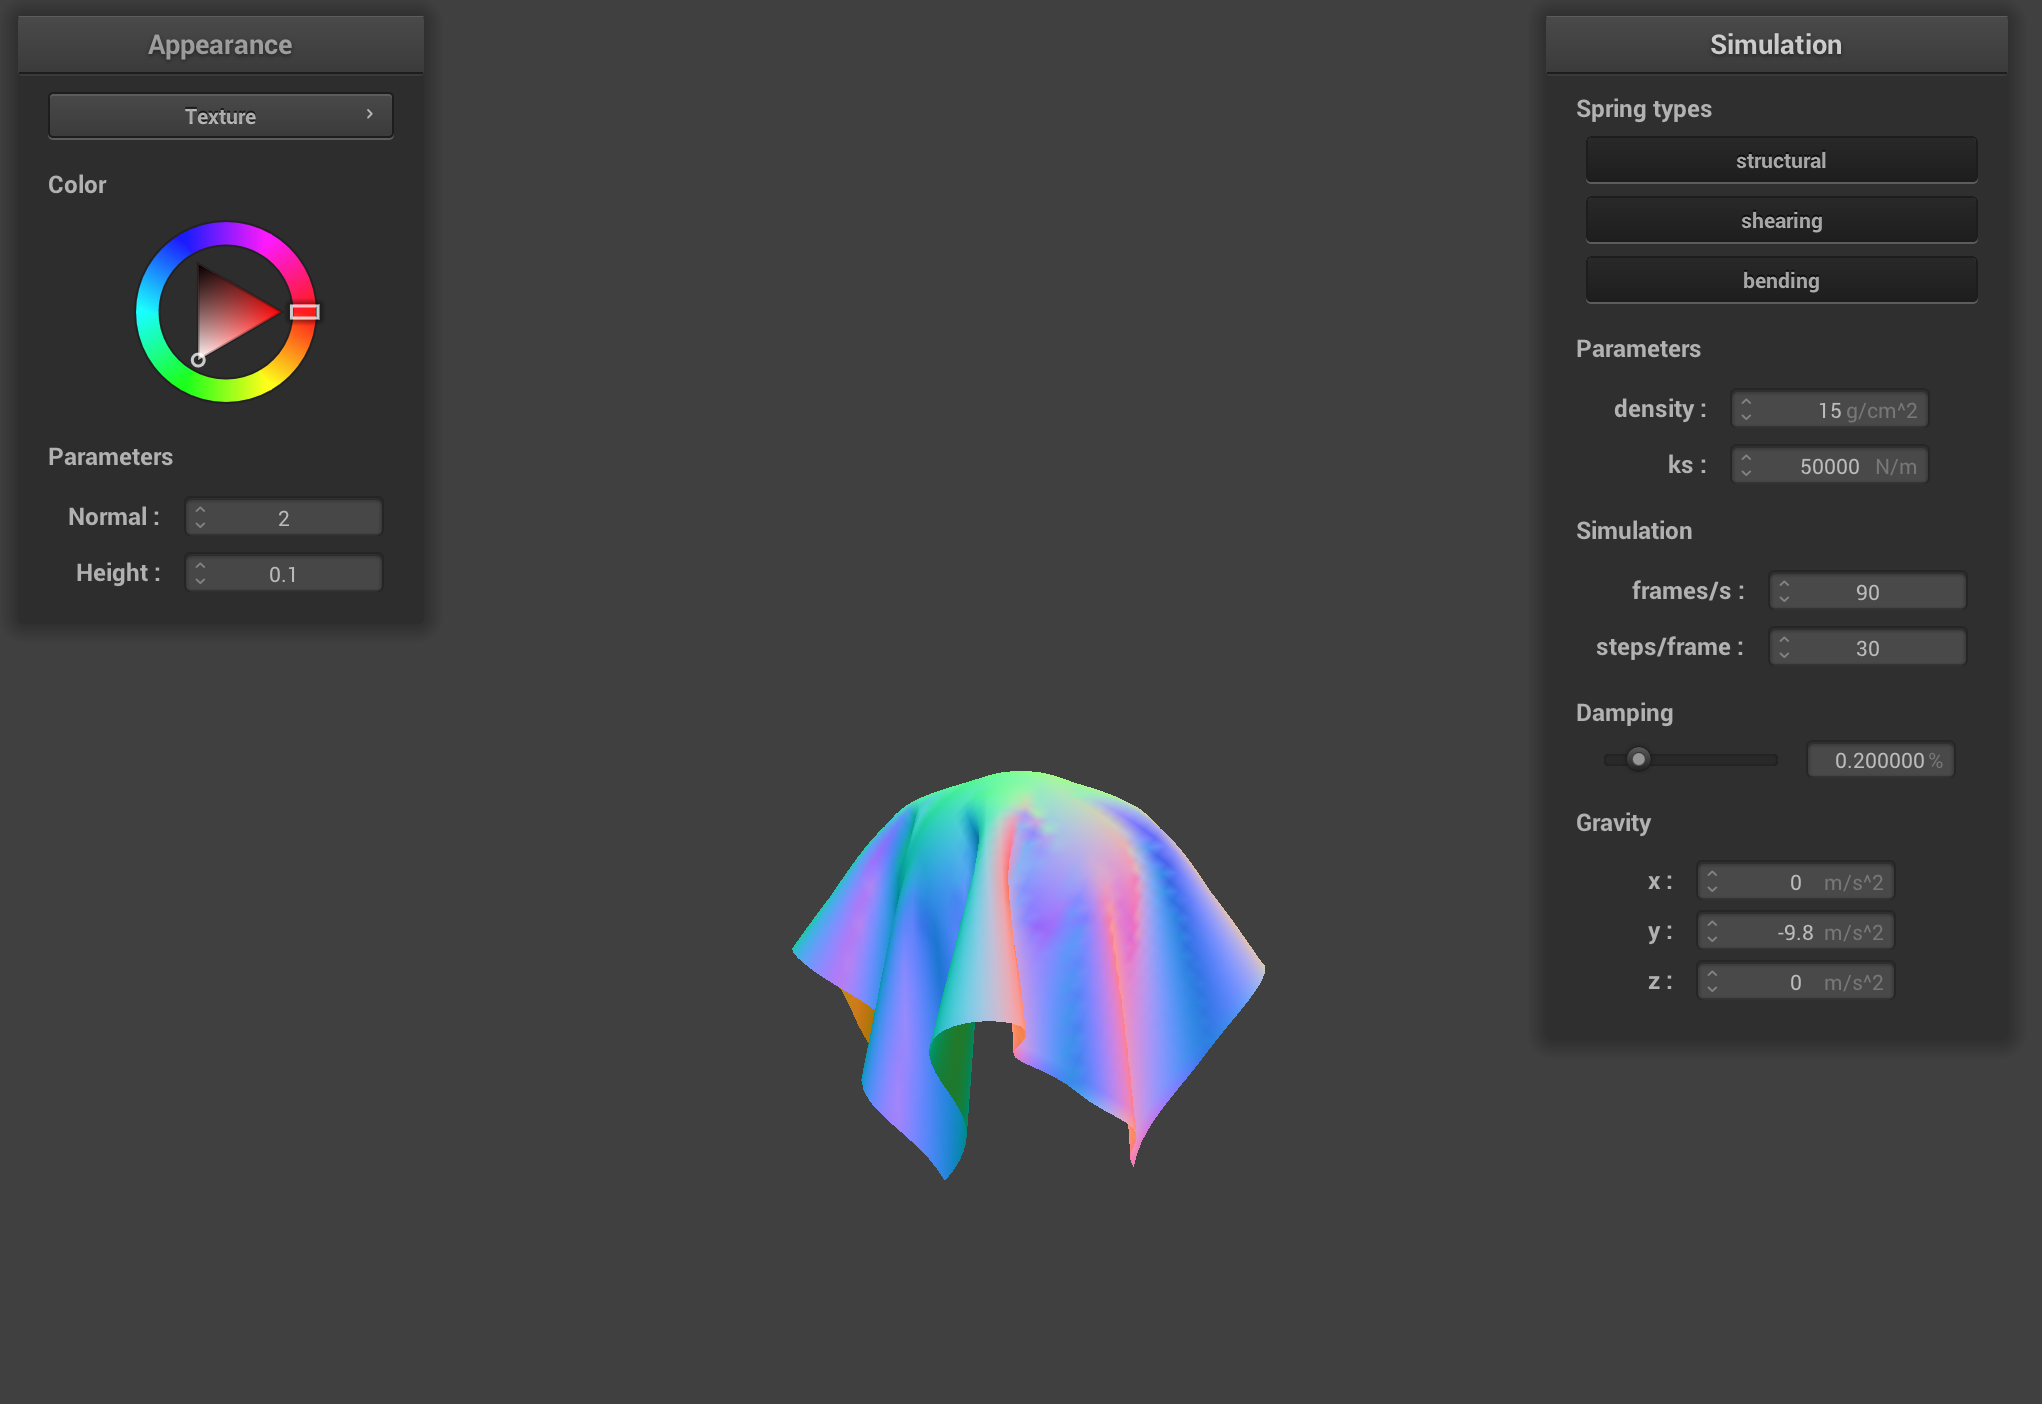
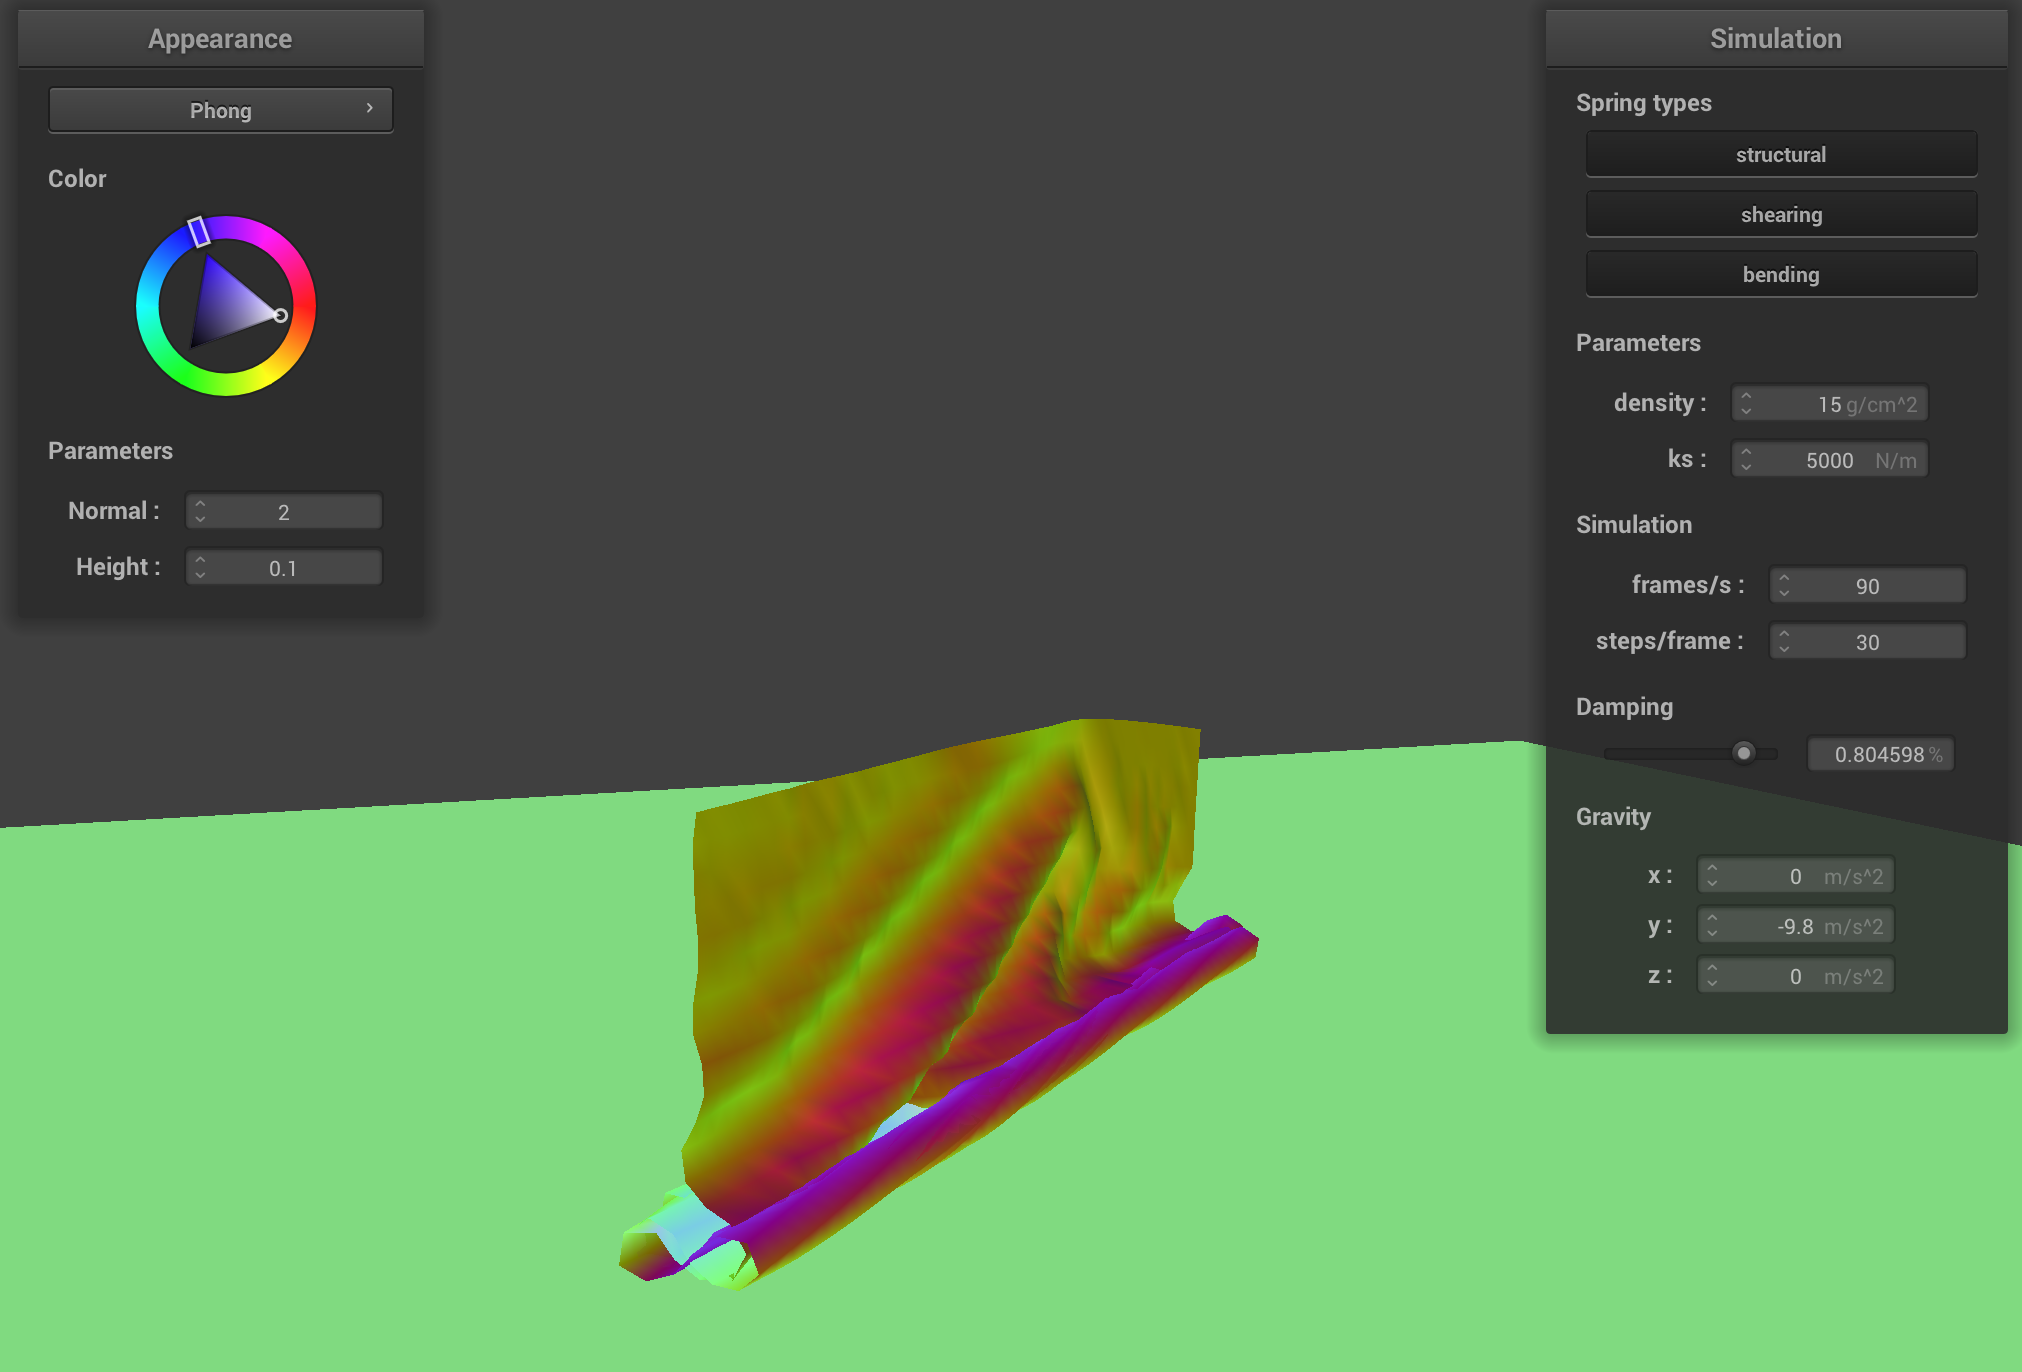
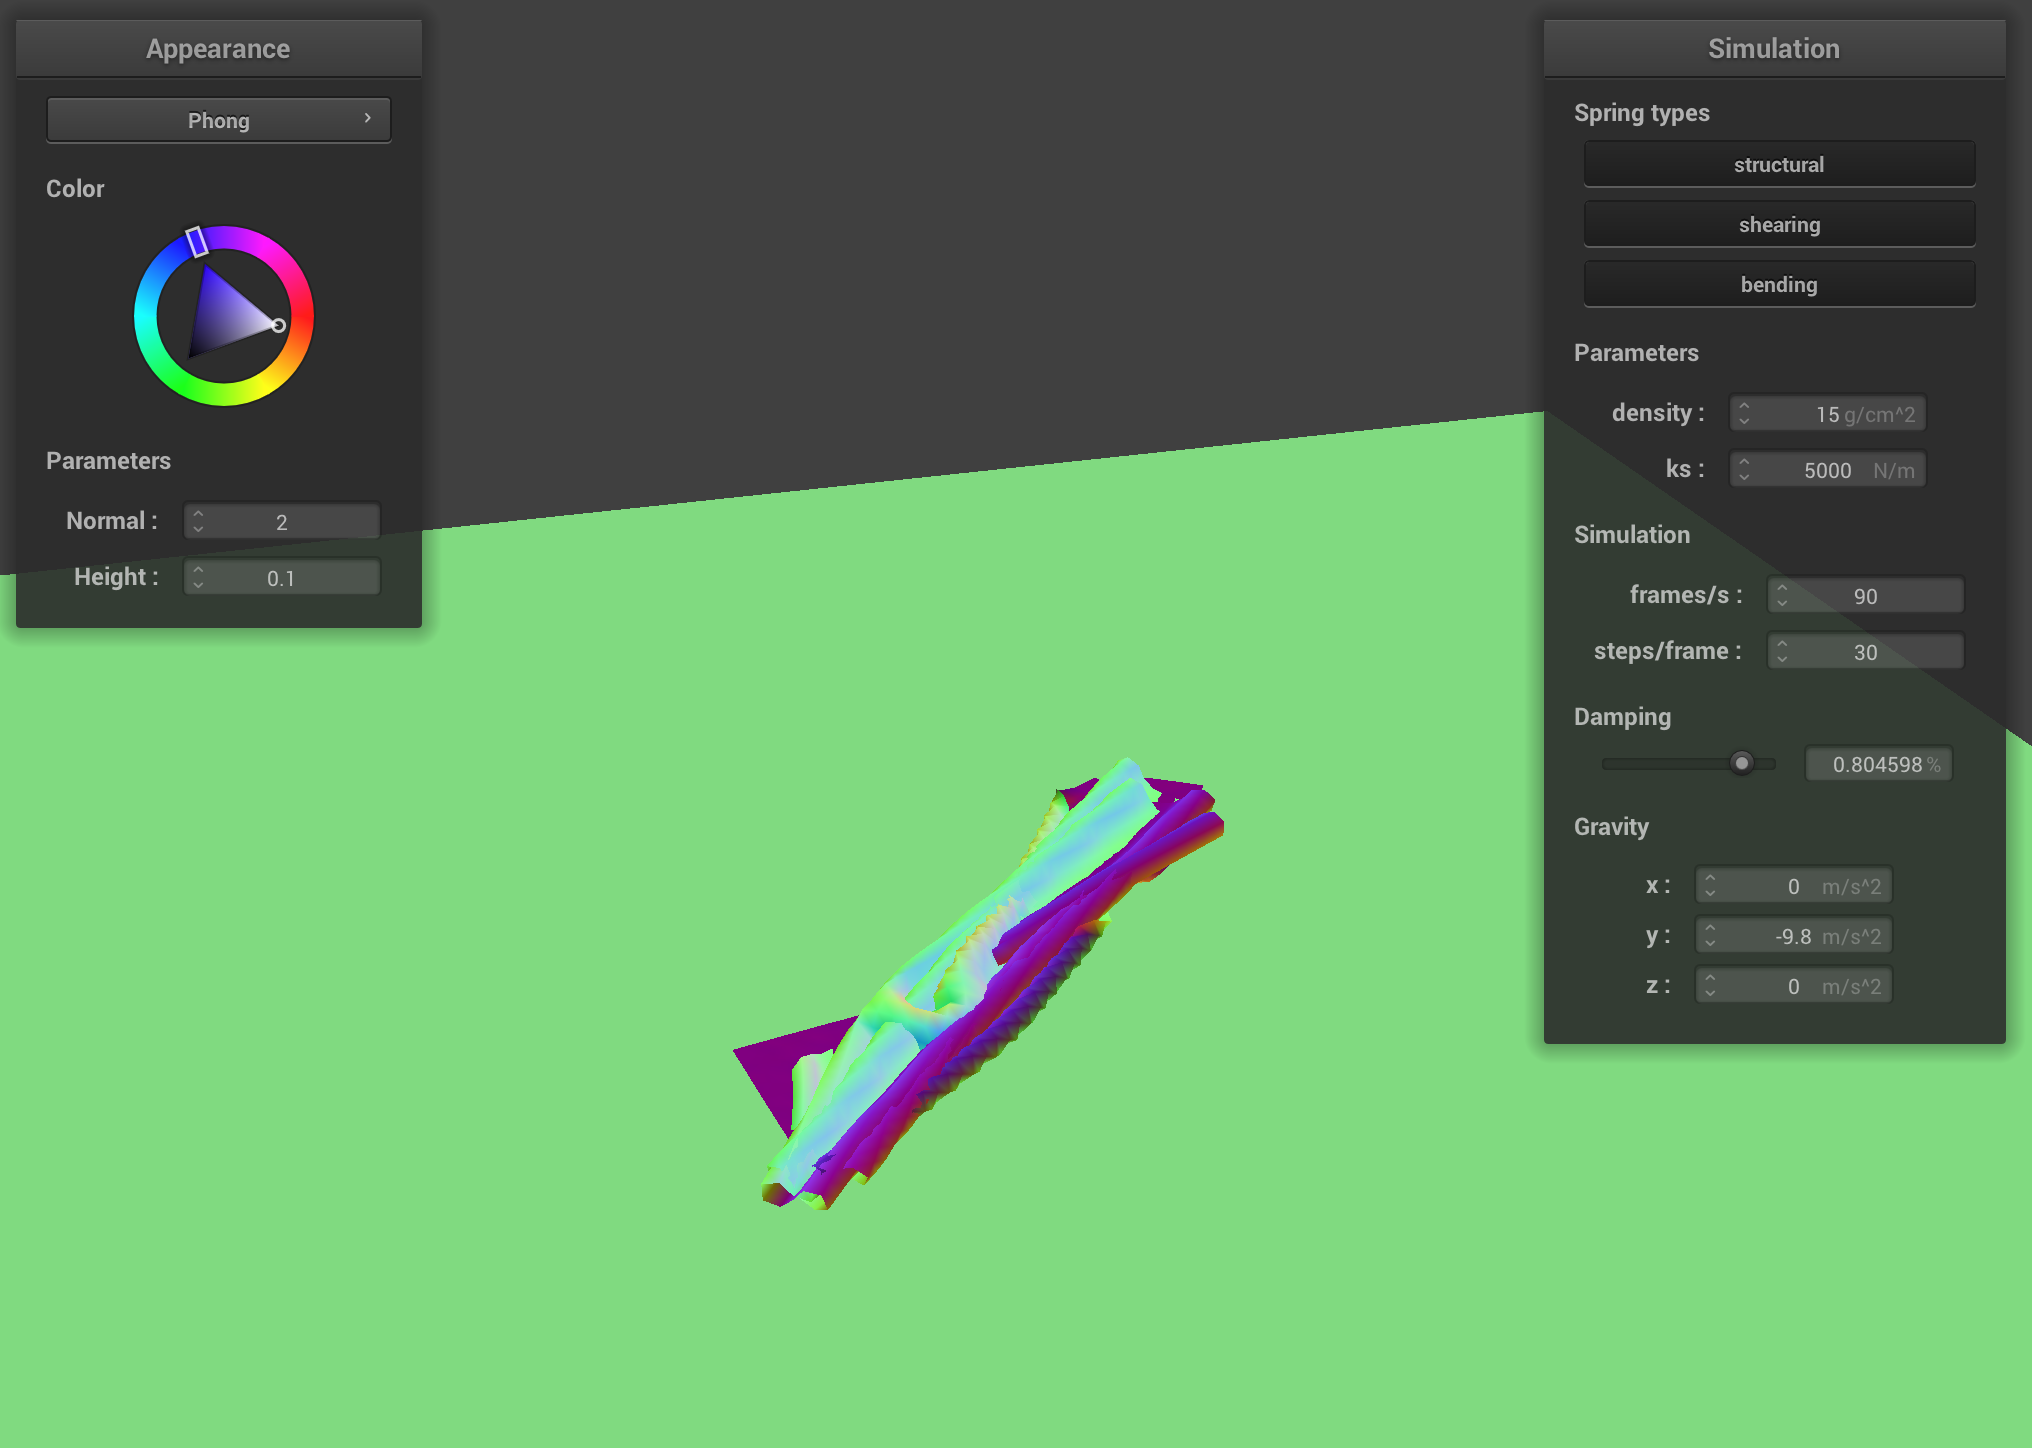
2. Show us screenshots of your shaded cloth from scene/sphere.json in its final resting state on the sphere using the default ks = 5000 as well as with ks = 500 and ks = 50000. Describe the differences in the results.
Video of a cloth falling on a sphere at ks = 500
Shaded cloth, ks = 5000
Shaded cloth, ks = 500
Shaded cloth, ks = 50000
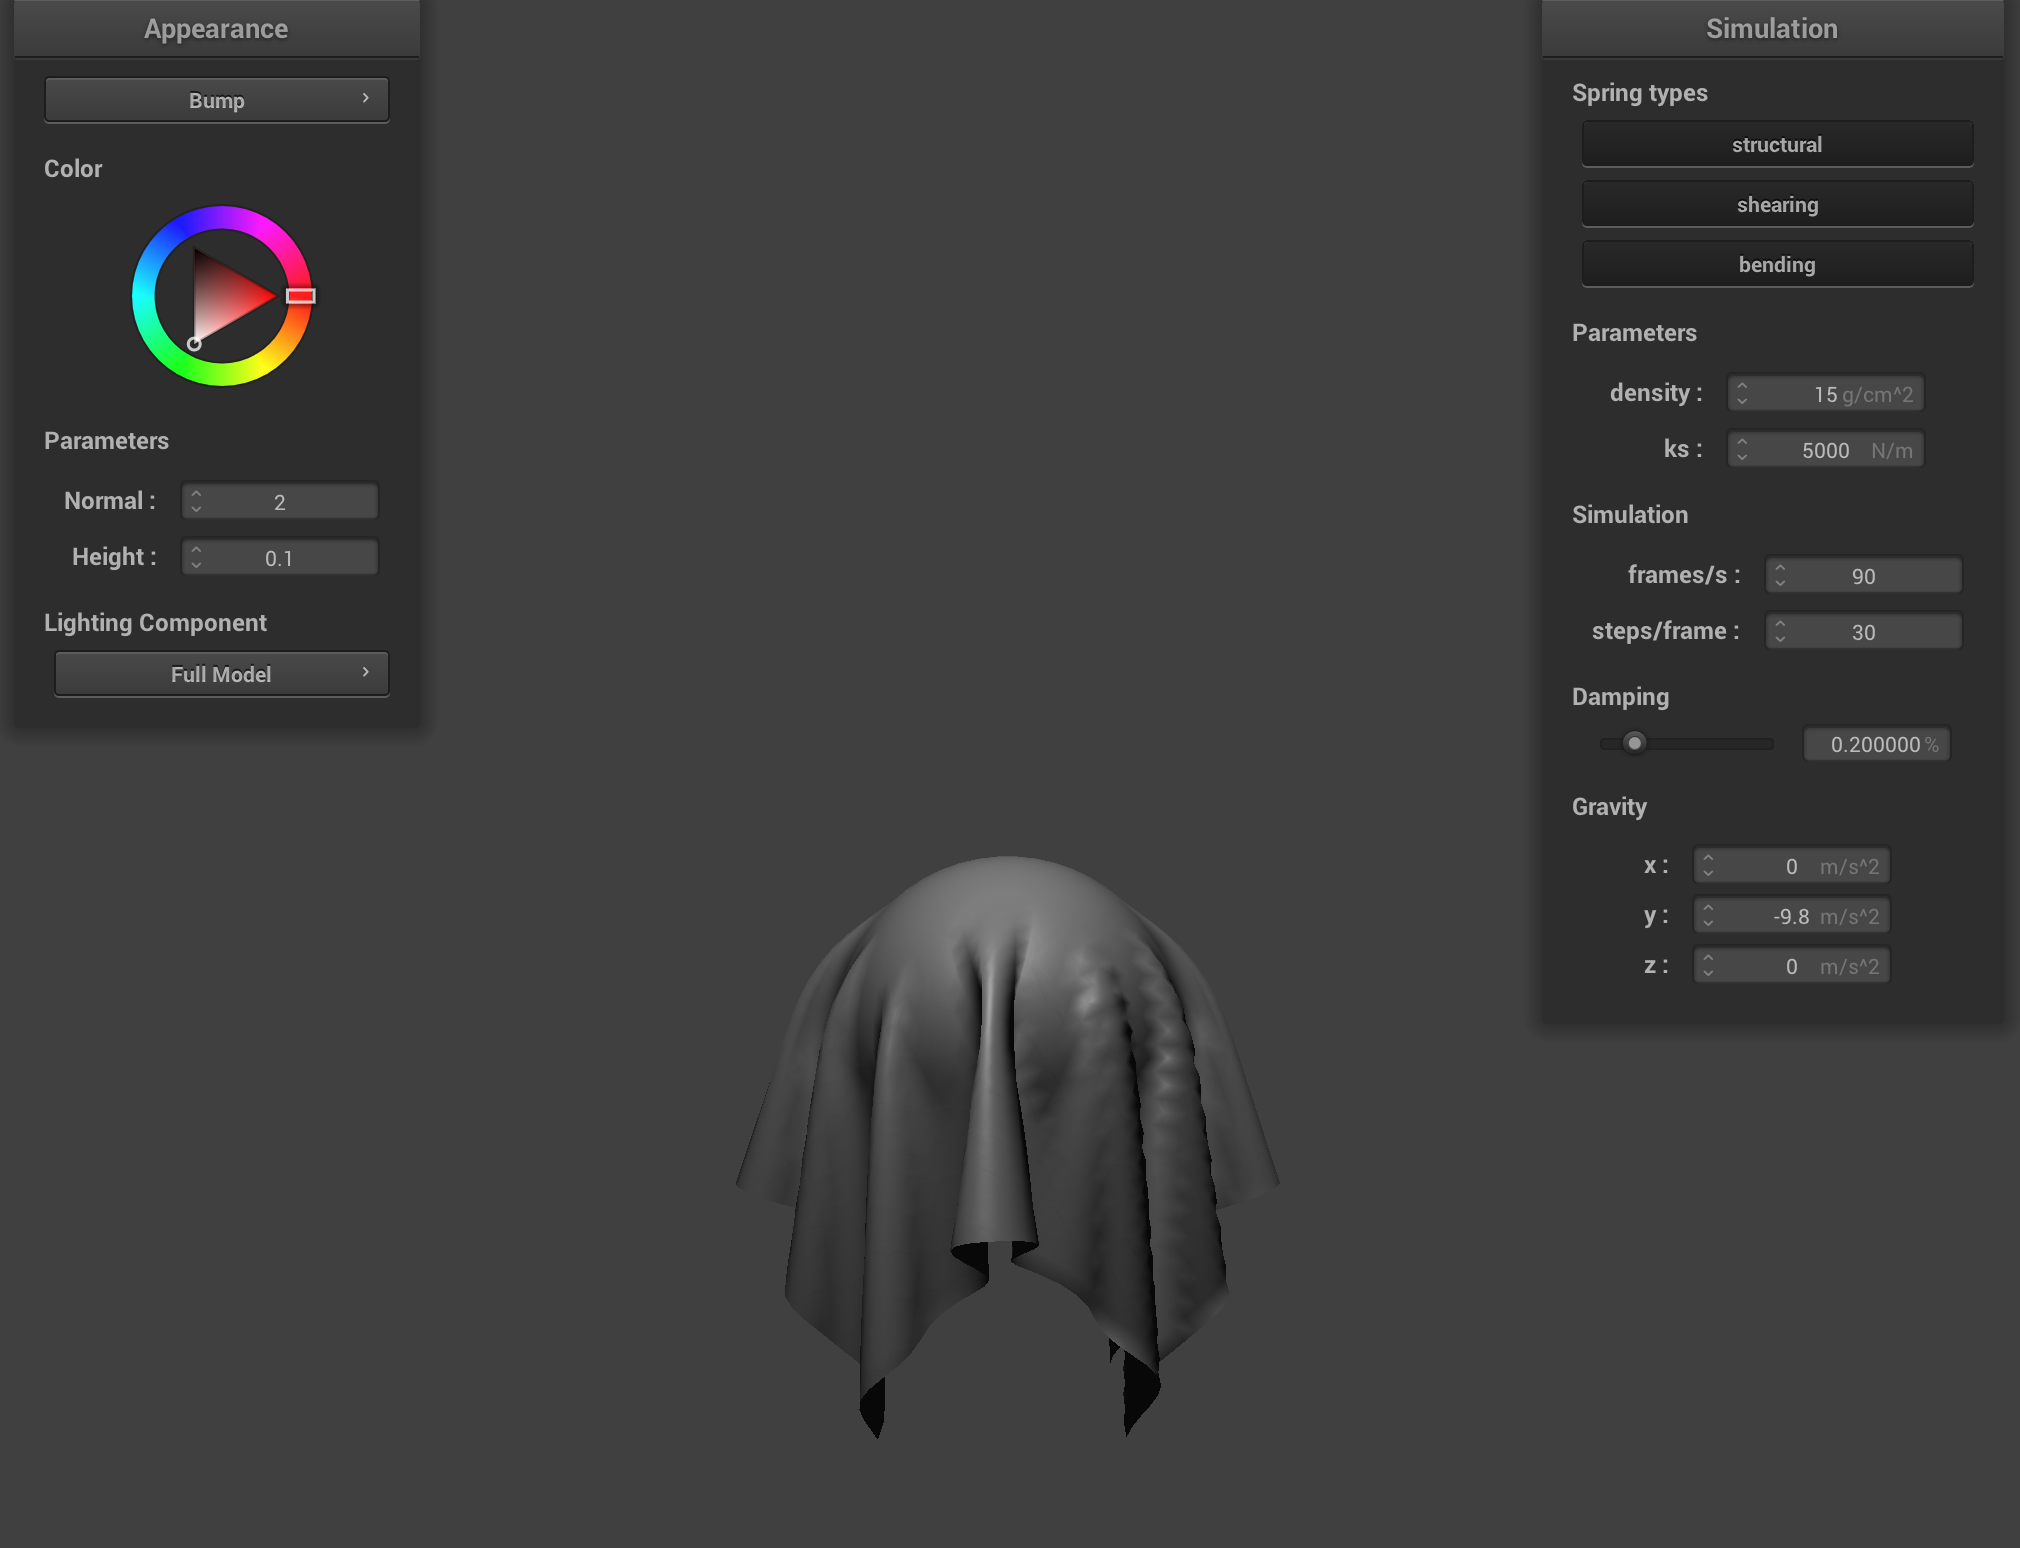
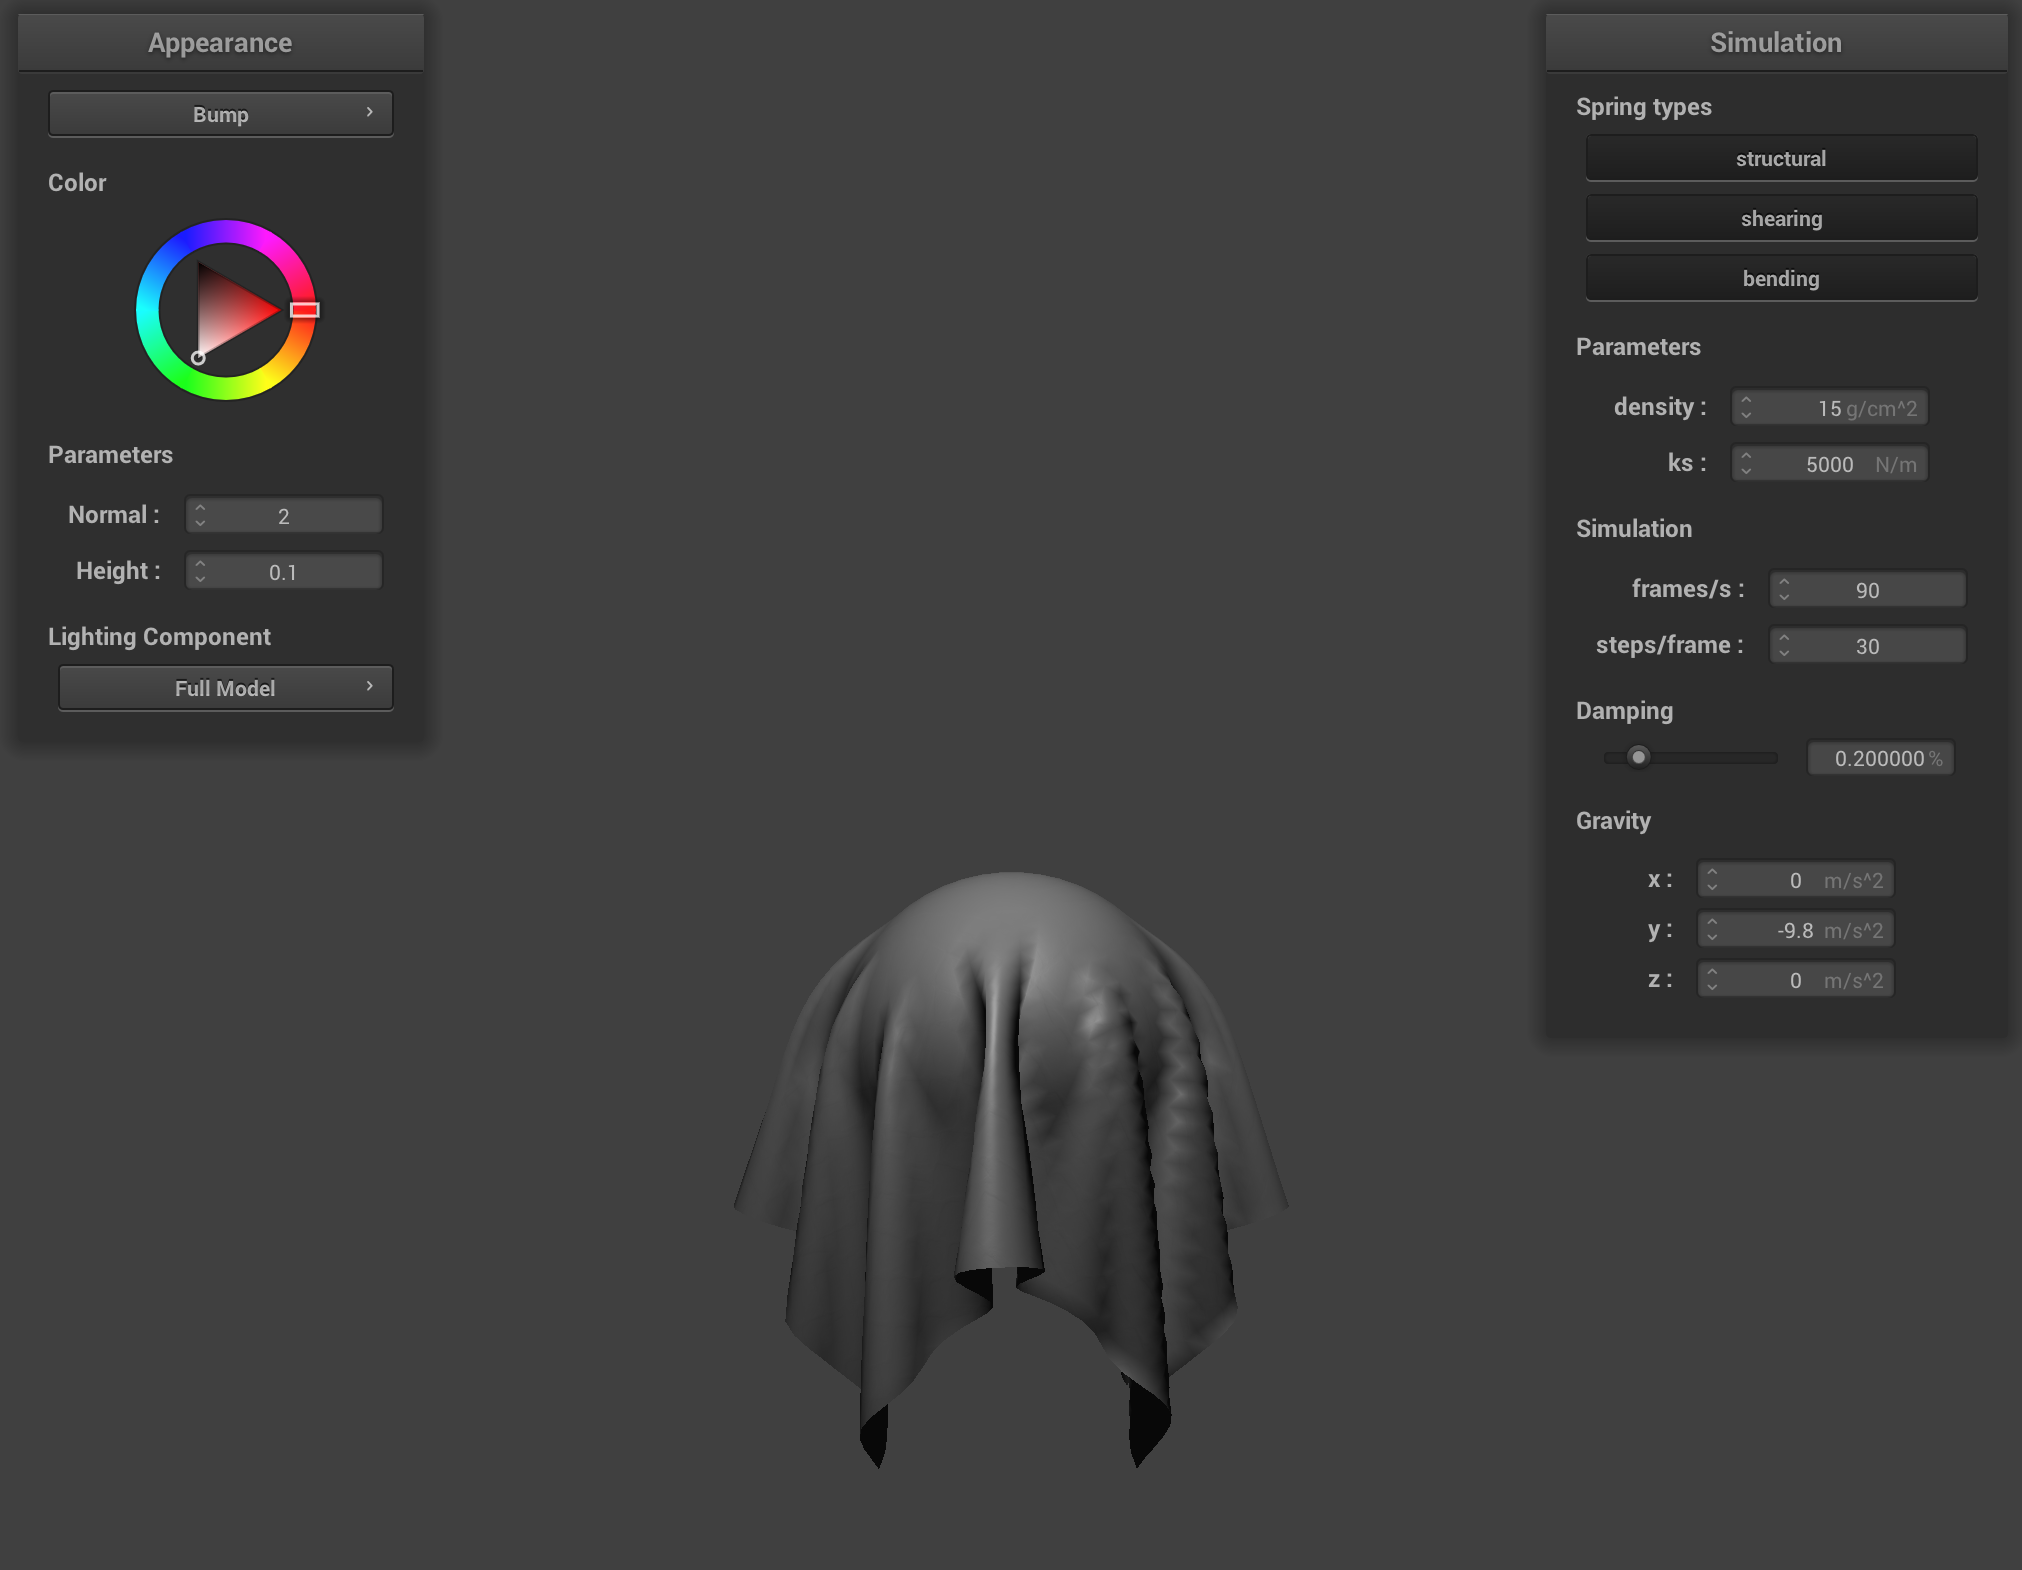
3. Show us a screenshot of your shaded cloth lying peacefully at rest on the plane. If you haven't by now, feel free to express your colorful creativity with the cloth! (You will need to complete the shaders portion first to show custom colors.)
Cloth on plane
Part 4: Handling self-collisions
1. Describe your implementation of handling self-collisions.
My implementation uses spatial hashing to efficiently detect and resolve cloth self-collisions. This approach divides the 3D space into box volumes and groups point masses that occupy the same volume, dramatically reducing the number of collision checks needed compared to testing all pairs.
The hash_position function creates a unique float identifier for each 3D box volume by calculating which box a point mass belongs to based on its position. I set the box dimensions proportional to the cloth's dimensions, using width and height parameters scaled by a factor of 3 divided by the number of points. This creates appropriately sized spatial partitions for collision detection.
The build_spatial_map function populates a hash table where each entry contains all point masses within the same spatial box. By clearing and rebuilding this map each simulation step, I made sure to sustain accurate spatial relationships even as the cloth moves and deforms.
The self_collide function handles the actual collision detection and response. For each point mass, it looks up potential collision candidates from the same spatial box and checks if any are closer than twice the thickness of the cloth. When such a collision is detected, it calculates a correction vector to push the point masses apart. The final correction is the average of all individual corrections, scaled by the simulation steps to ensure that movement is stable and without sudden jumps.
2. Show us at least 3 screenshots that document how your cloth falls and folds on itself, starting with an early, initial self-collision and ending with the cloth at a more restful state (even if it is still slightly bouncy on the ground).
Initial Collision
Halfway collision
Final Restful State
3. Vary the density as well as ks and describe with words and screenshots how they affect the behavior of the cloth as it falls on itself.
Density Variation
Density = 300 g/cm^2
Density = 1 g/cm^2
A low-density cloth falls slowly and creates gentle, floating-like self-collisions. The material appears to almost hover as it folds, with less momentum driving the collision interactions. This results in smaller, more numerous folds as the cloth settles lightly onto itself.
A high-density cloth falls much more rapidly and creates more forceful self-collisions. The increased momentum causes deeper, more pronounced folds as heavier sections drive into one another. The final configuration shows fewer but deeper folds, as the material's weight overcomes some of the resistance to folding.
Spring Constant Variation
Shaded cloth, ks = 5000
Shaded cloth, ks = 500
Shaded cloth, ks = 50000
With a high spring constant, the cloth behaves rigidly. During self-collision, it forms sharp, defined creases and maintains its structure more stubbornly. When folding occurs, the material creates more prominent peaks and valleys with angular formations. The cloth strongly resists stretching, resulting in more pronounced buckling and wrinkling when parts collide. The final resting state shows a cloth with distinct, well-defined folds that maintain their shape rather than flattening out.
With a low spring constant, the cloth is crushed with significant deformation seen during self-collision. In other words, when parts collide, they compress easily against each other. The final resting state shows a cloth that appears almost melted onto itself.
Part 5: Cloth Sim
1. Explain in your own words what is a shader program and how vertex and fragment shaders work together to create lighting and material effects.
A shader program is a specialized piece of code that runs directly on the GPU, controlling how objects are processed and rendered in a graphics pipeline. Vertex and fragment shaders work together in a sequential pipeline.
Vertex shaders process each vertex of a 3D model, handling position transformations, normal transformations, and passing data like texture coordinates to the next stage. They transform vertices from model space through world space to screen space.
Fragment shaders (also called pixel shaders) operate after the rasterization step, determining the final color for each pixel or fragment. They handle lighting calculations, texture sampling, and all visual material properties that determine an object's appearance.
This is efficient: vertex shaders handle the geometry (relatively fewer vertices), while fragment shaders focus on the color and lighting of each pixel (many more). Together, they create a complete rendering system where the vertex shader prepares the scene geometry and the fragment shader applies the visual characteristics.
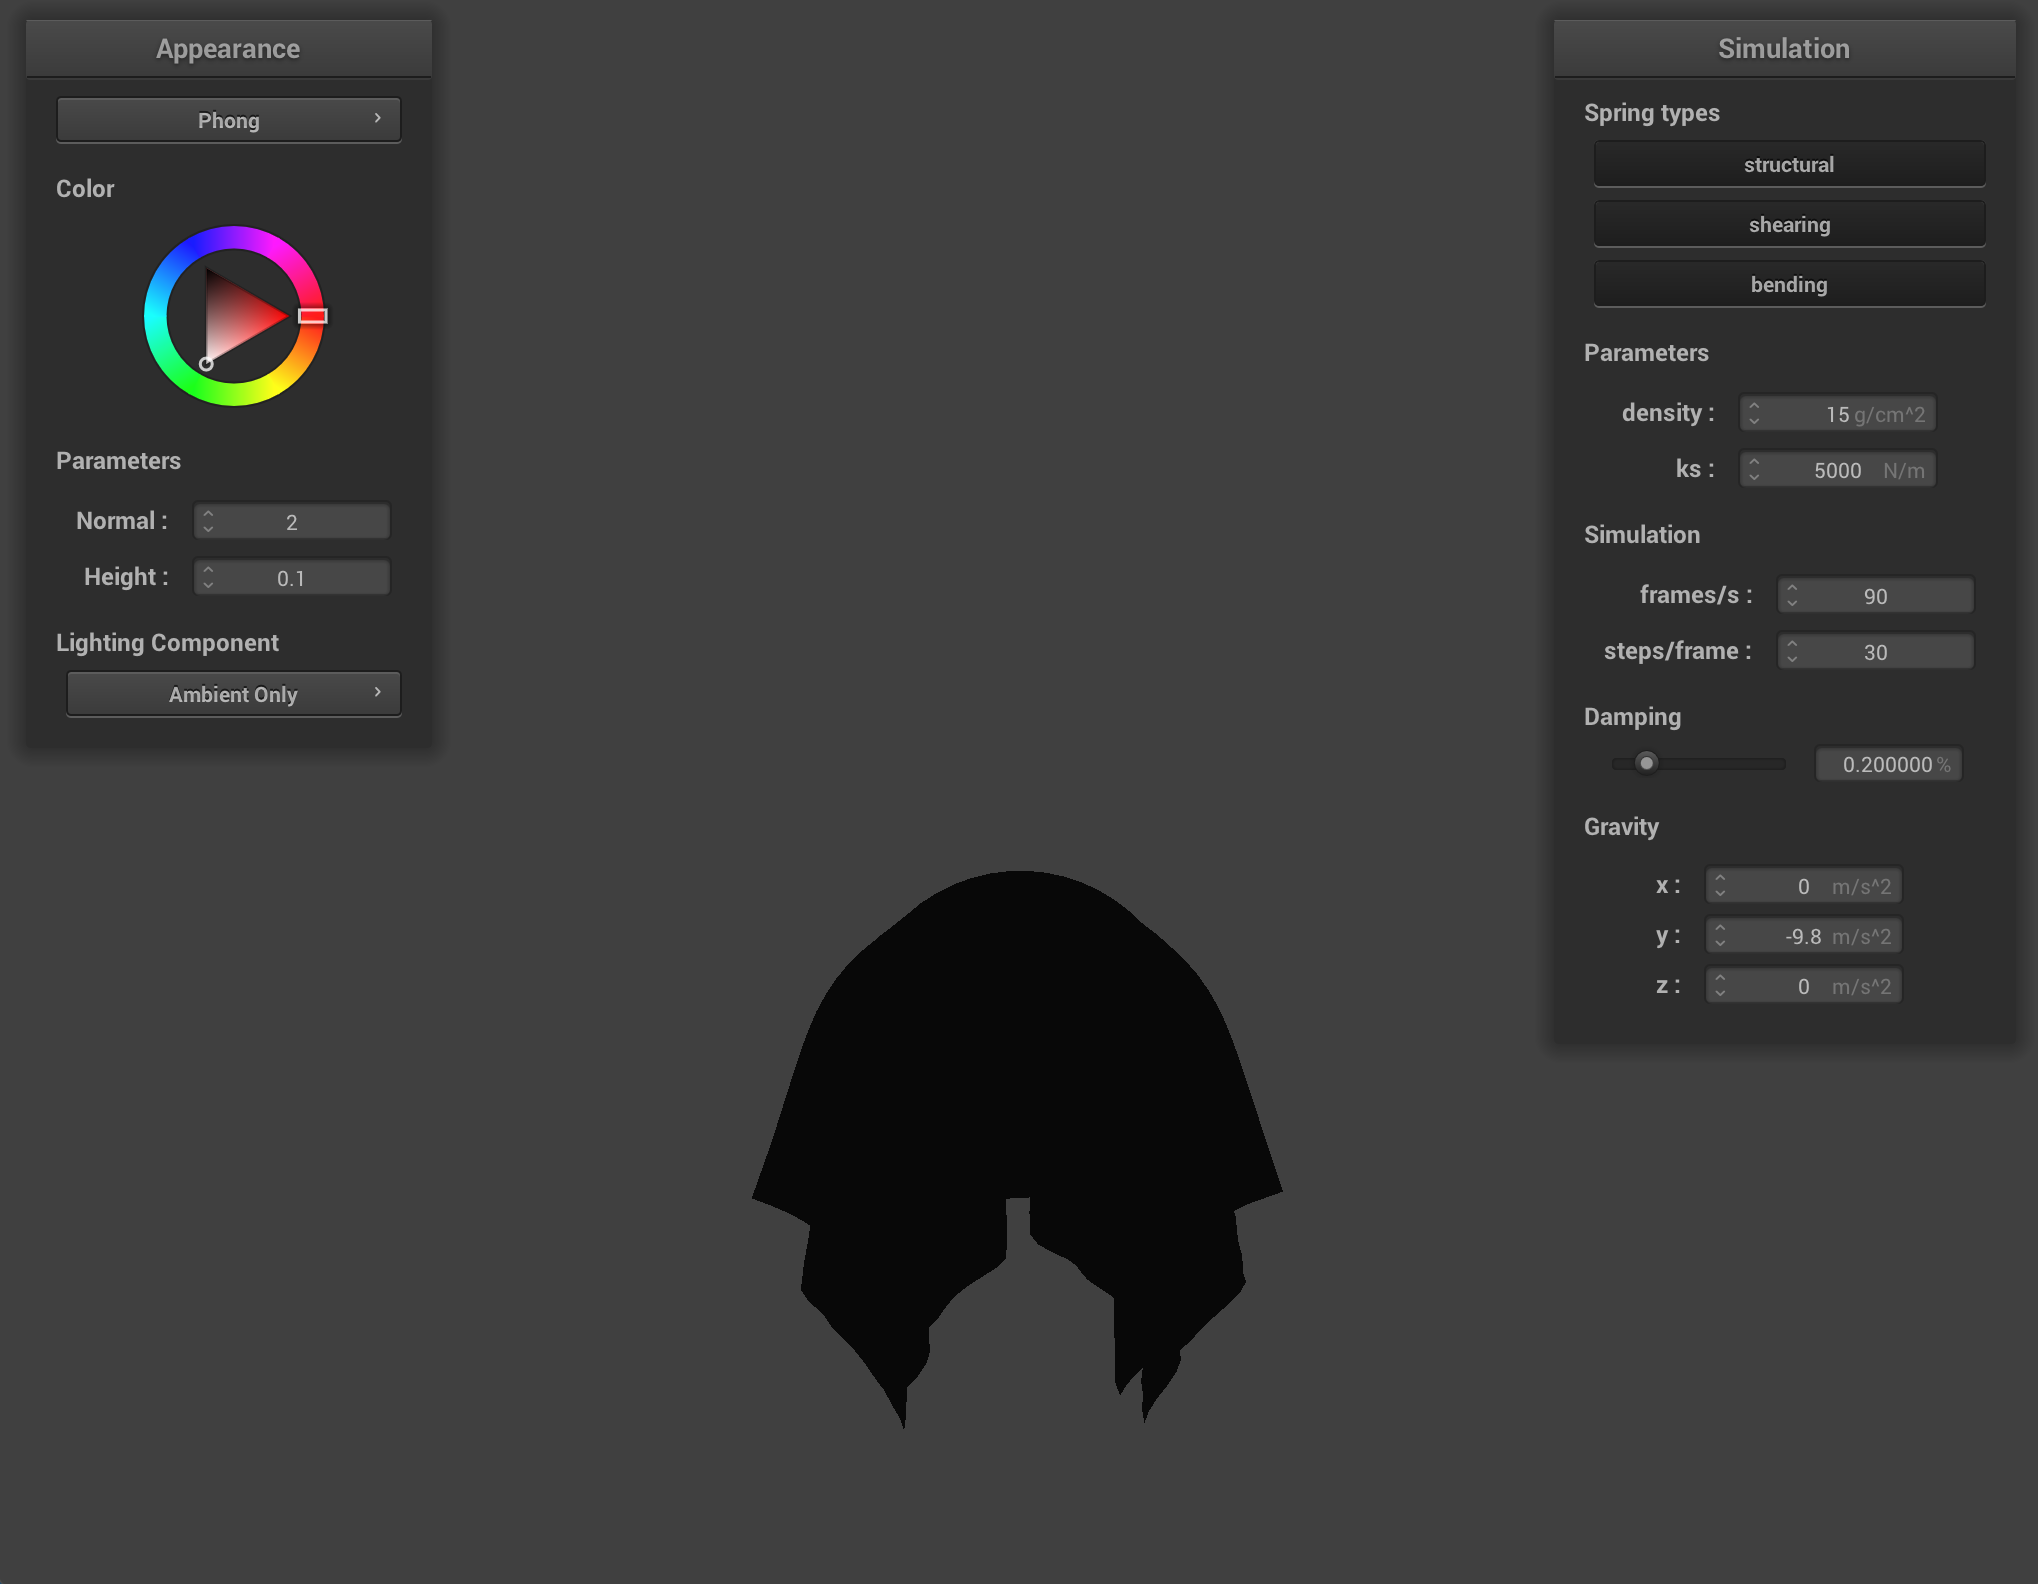
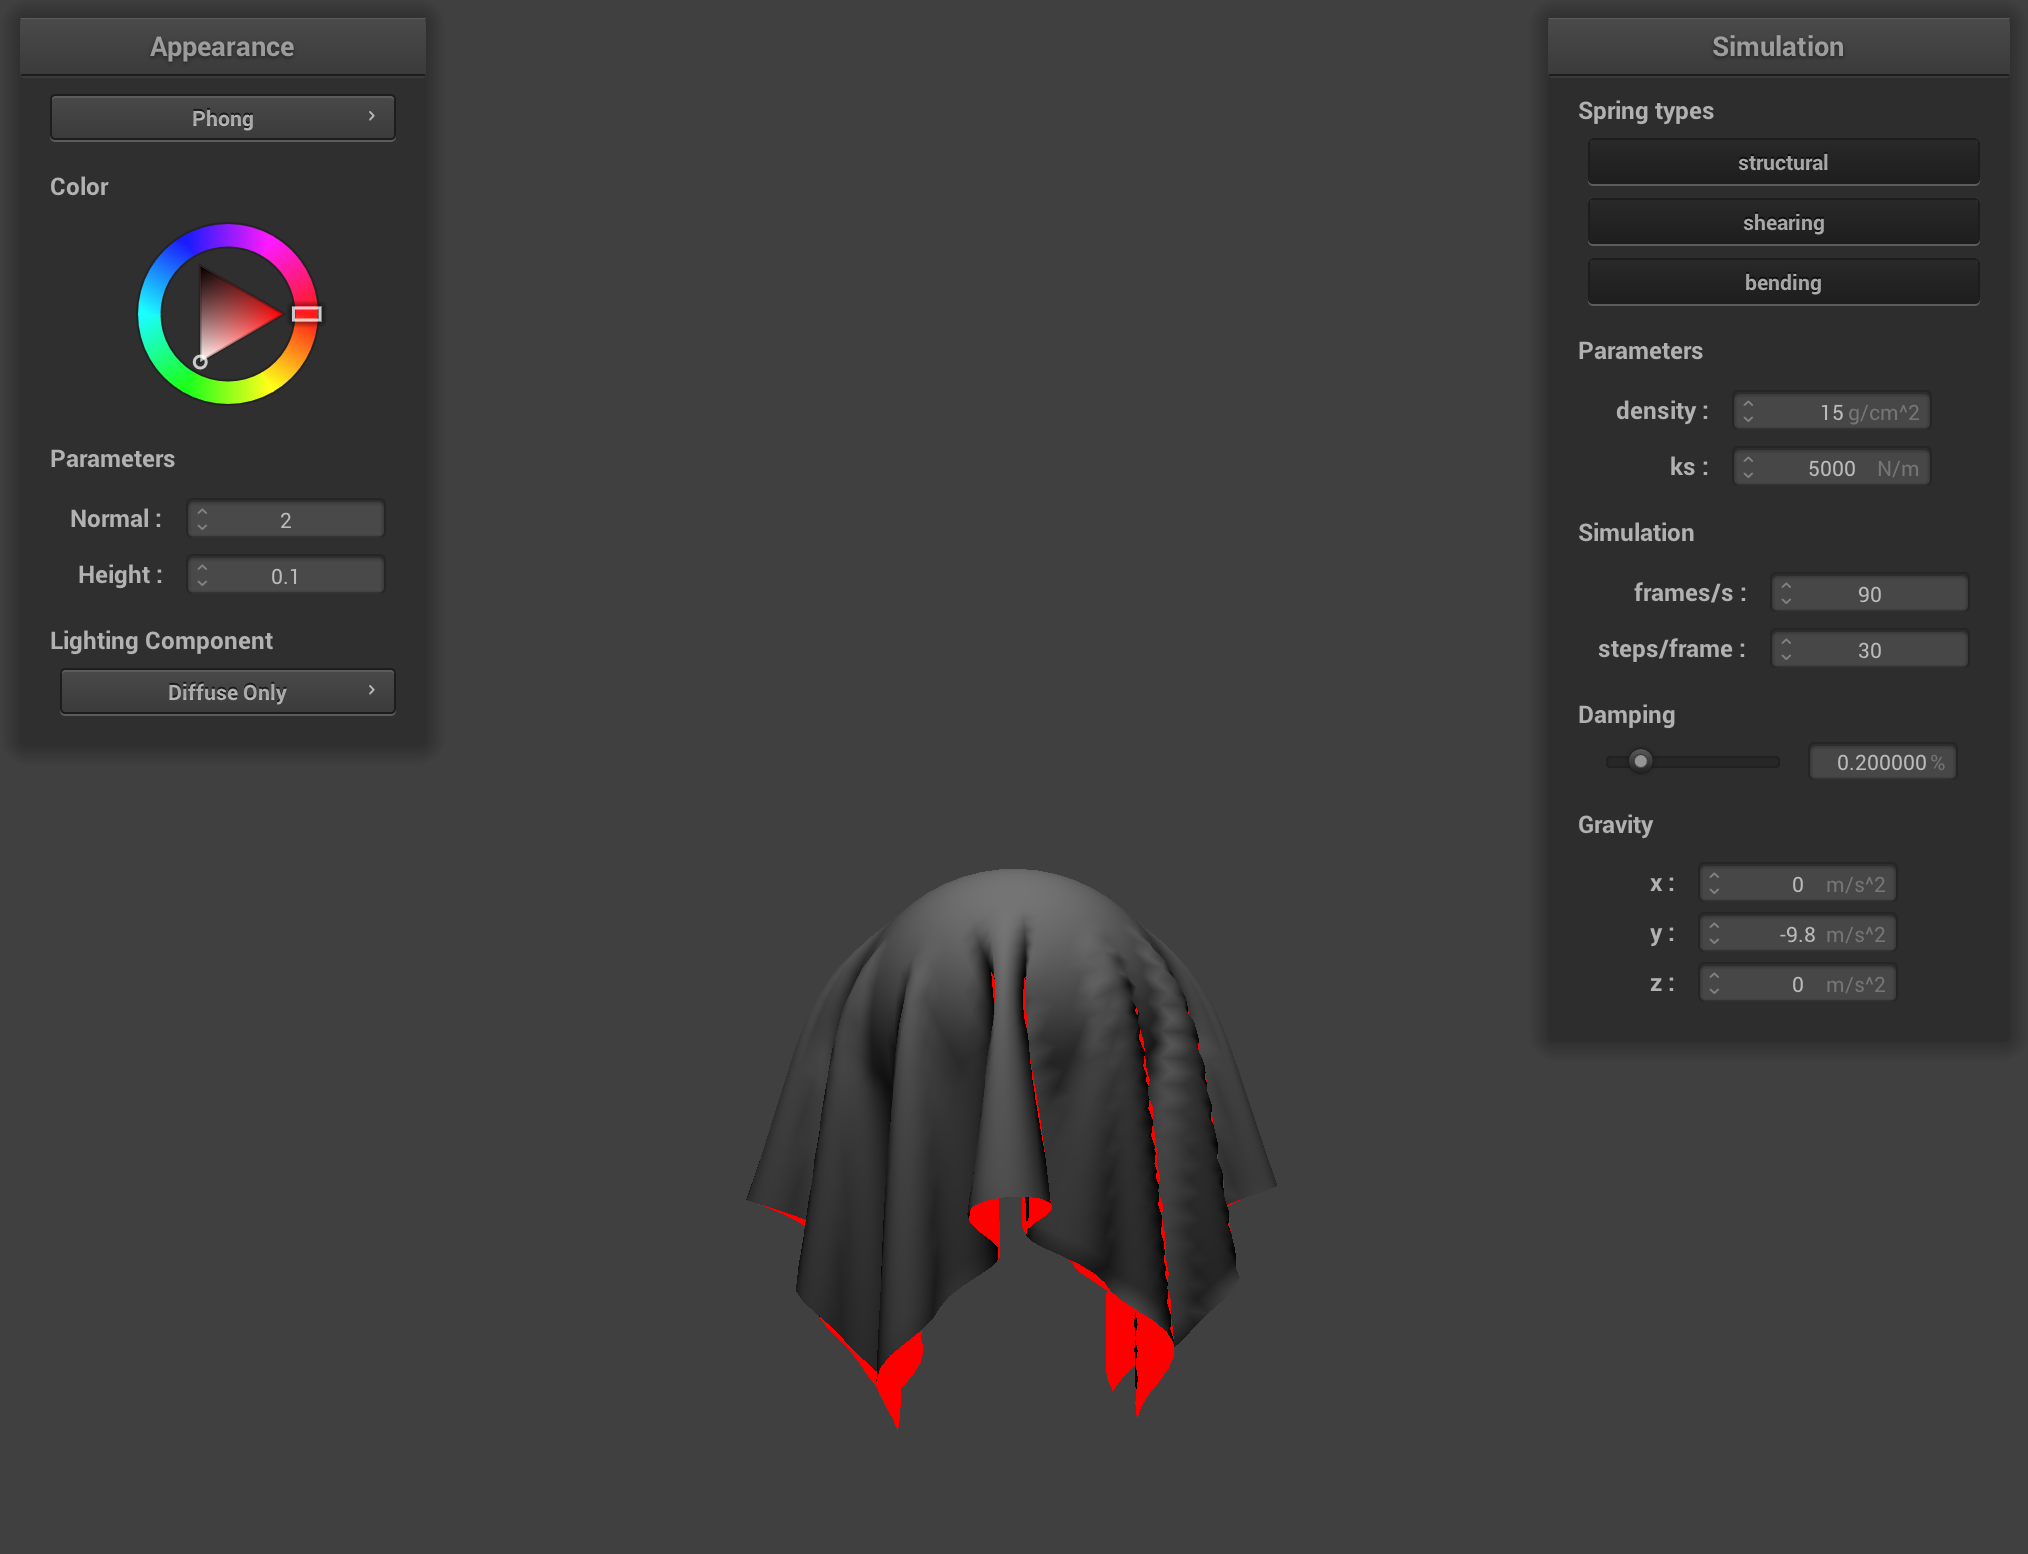
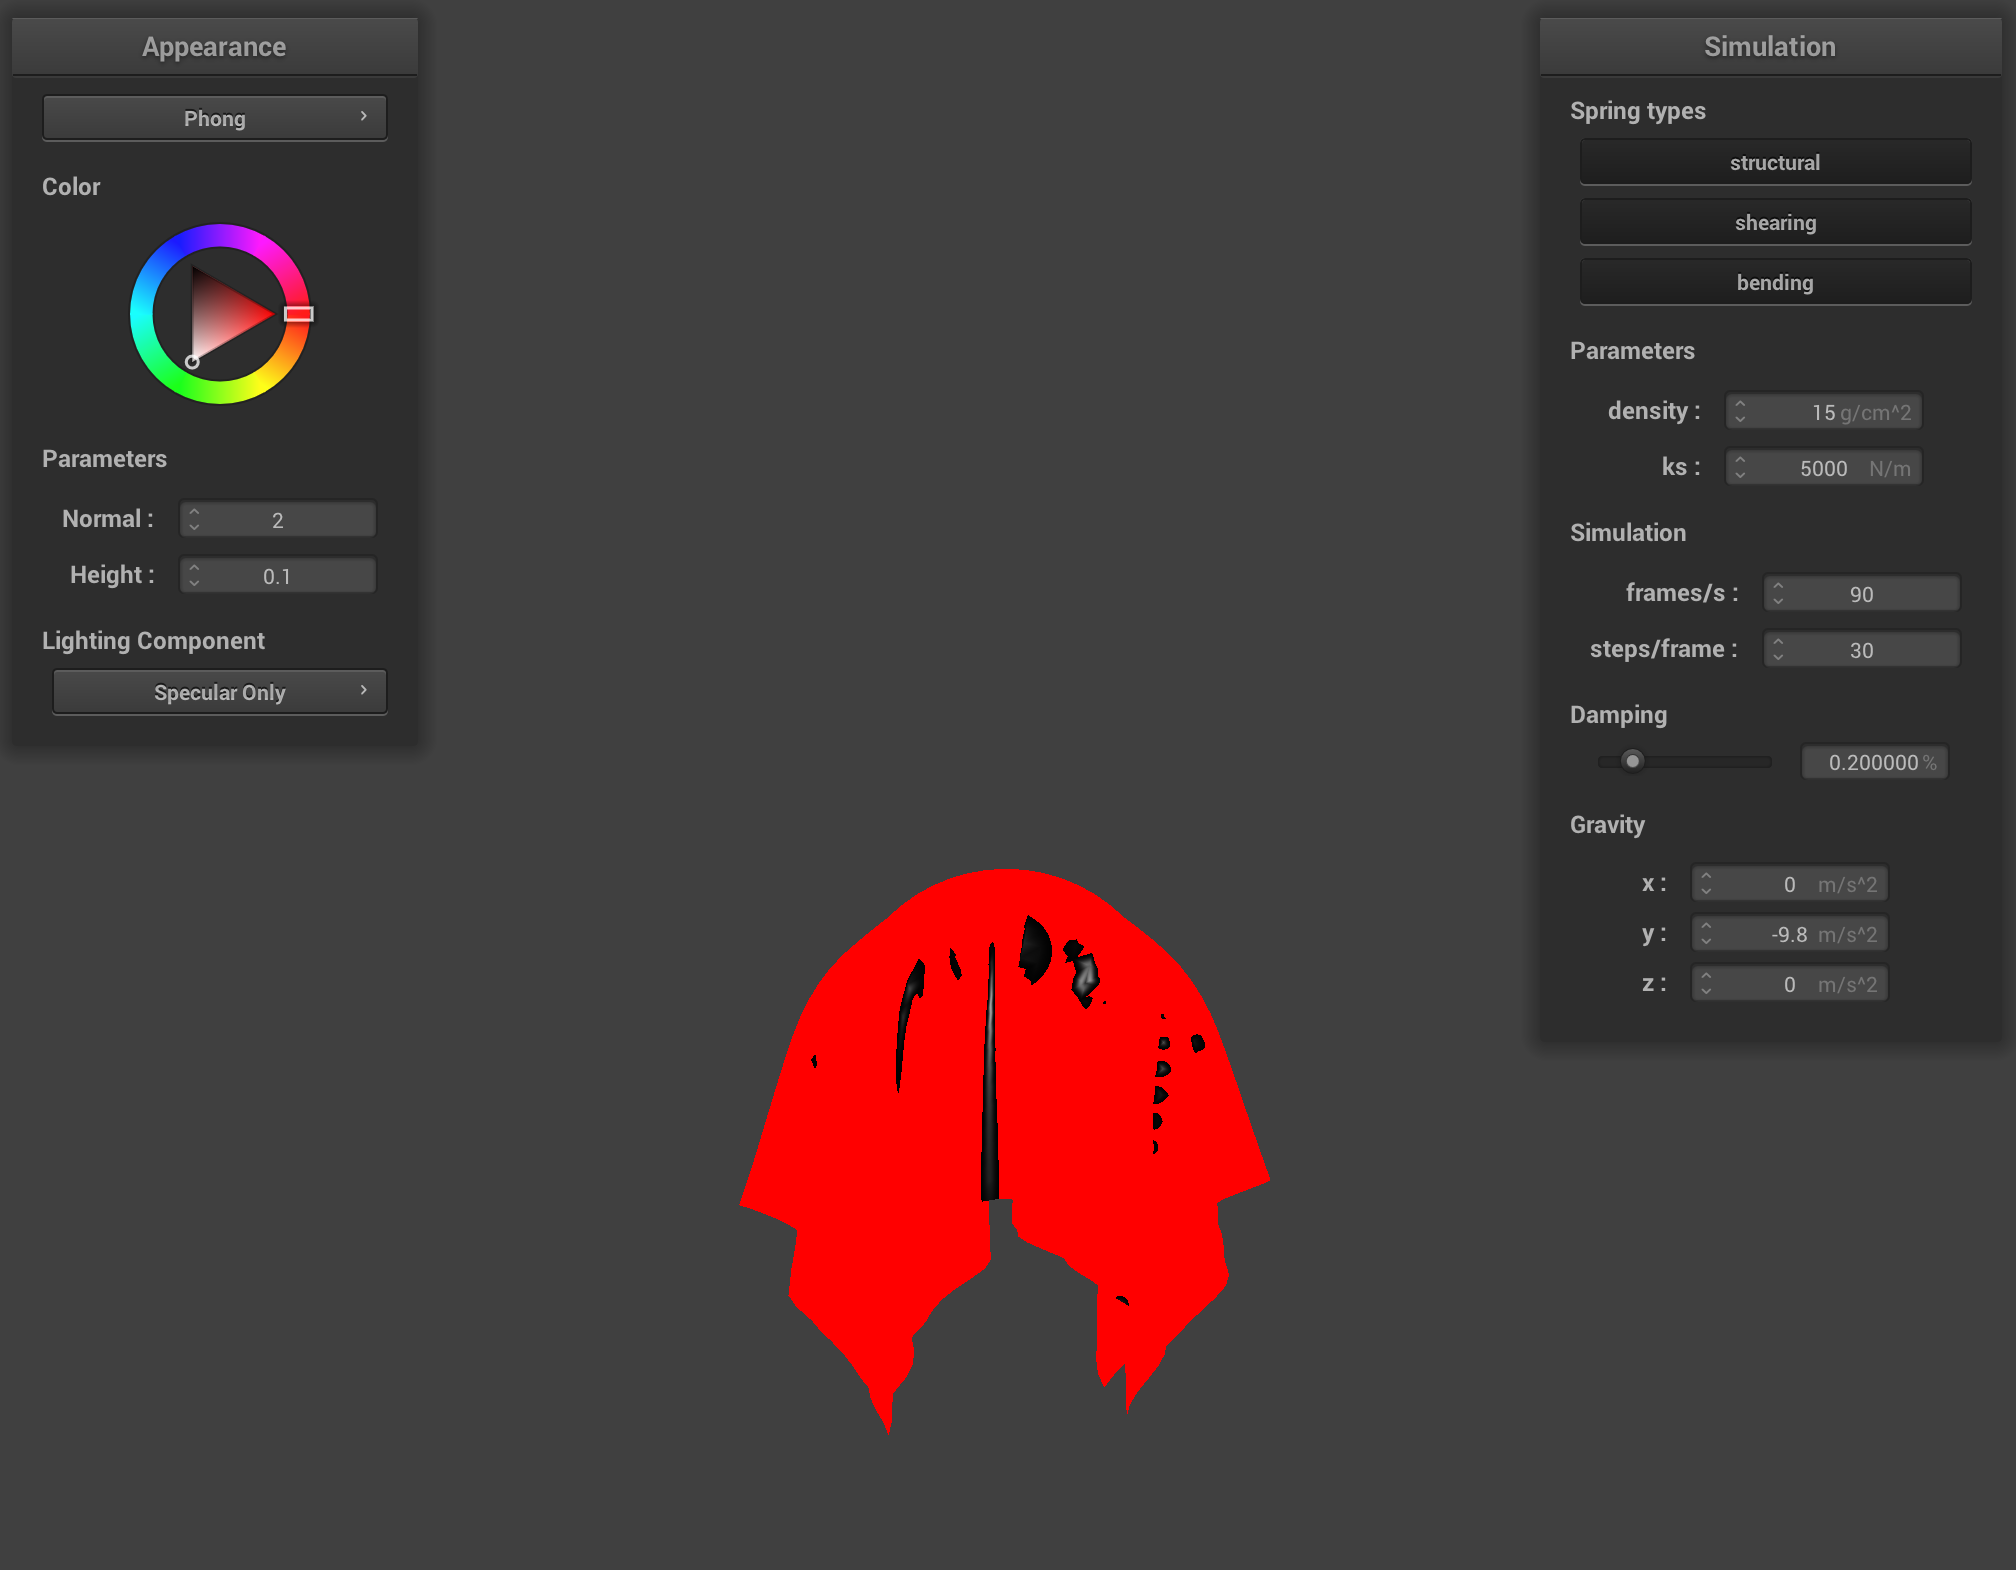
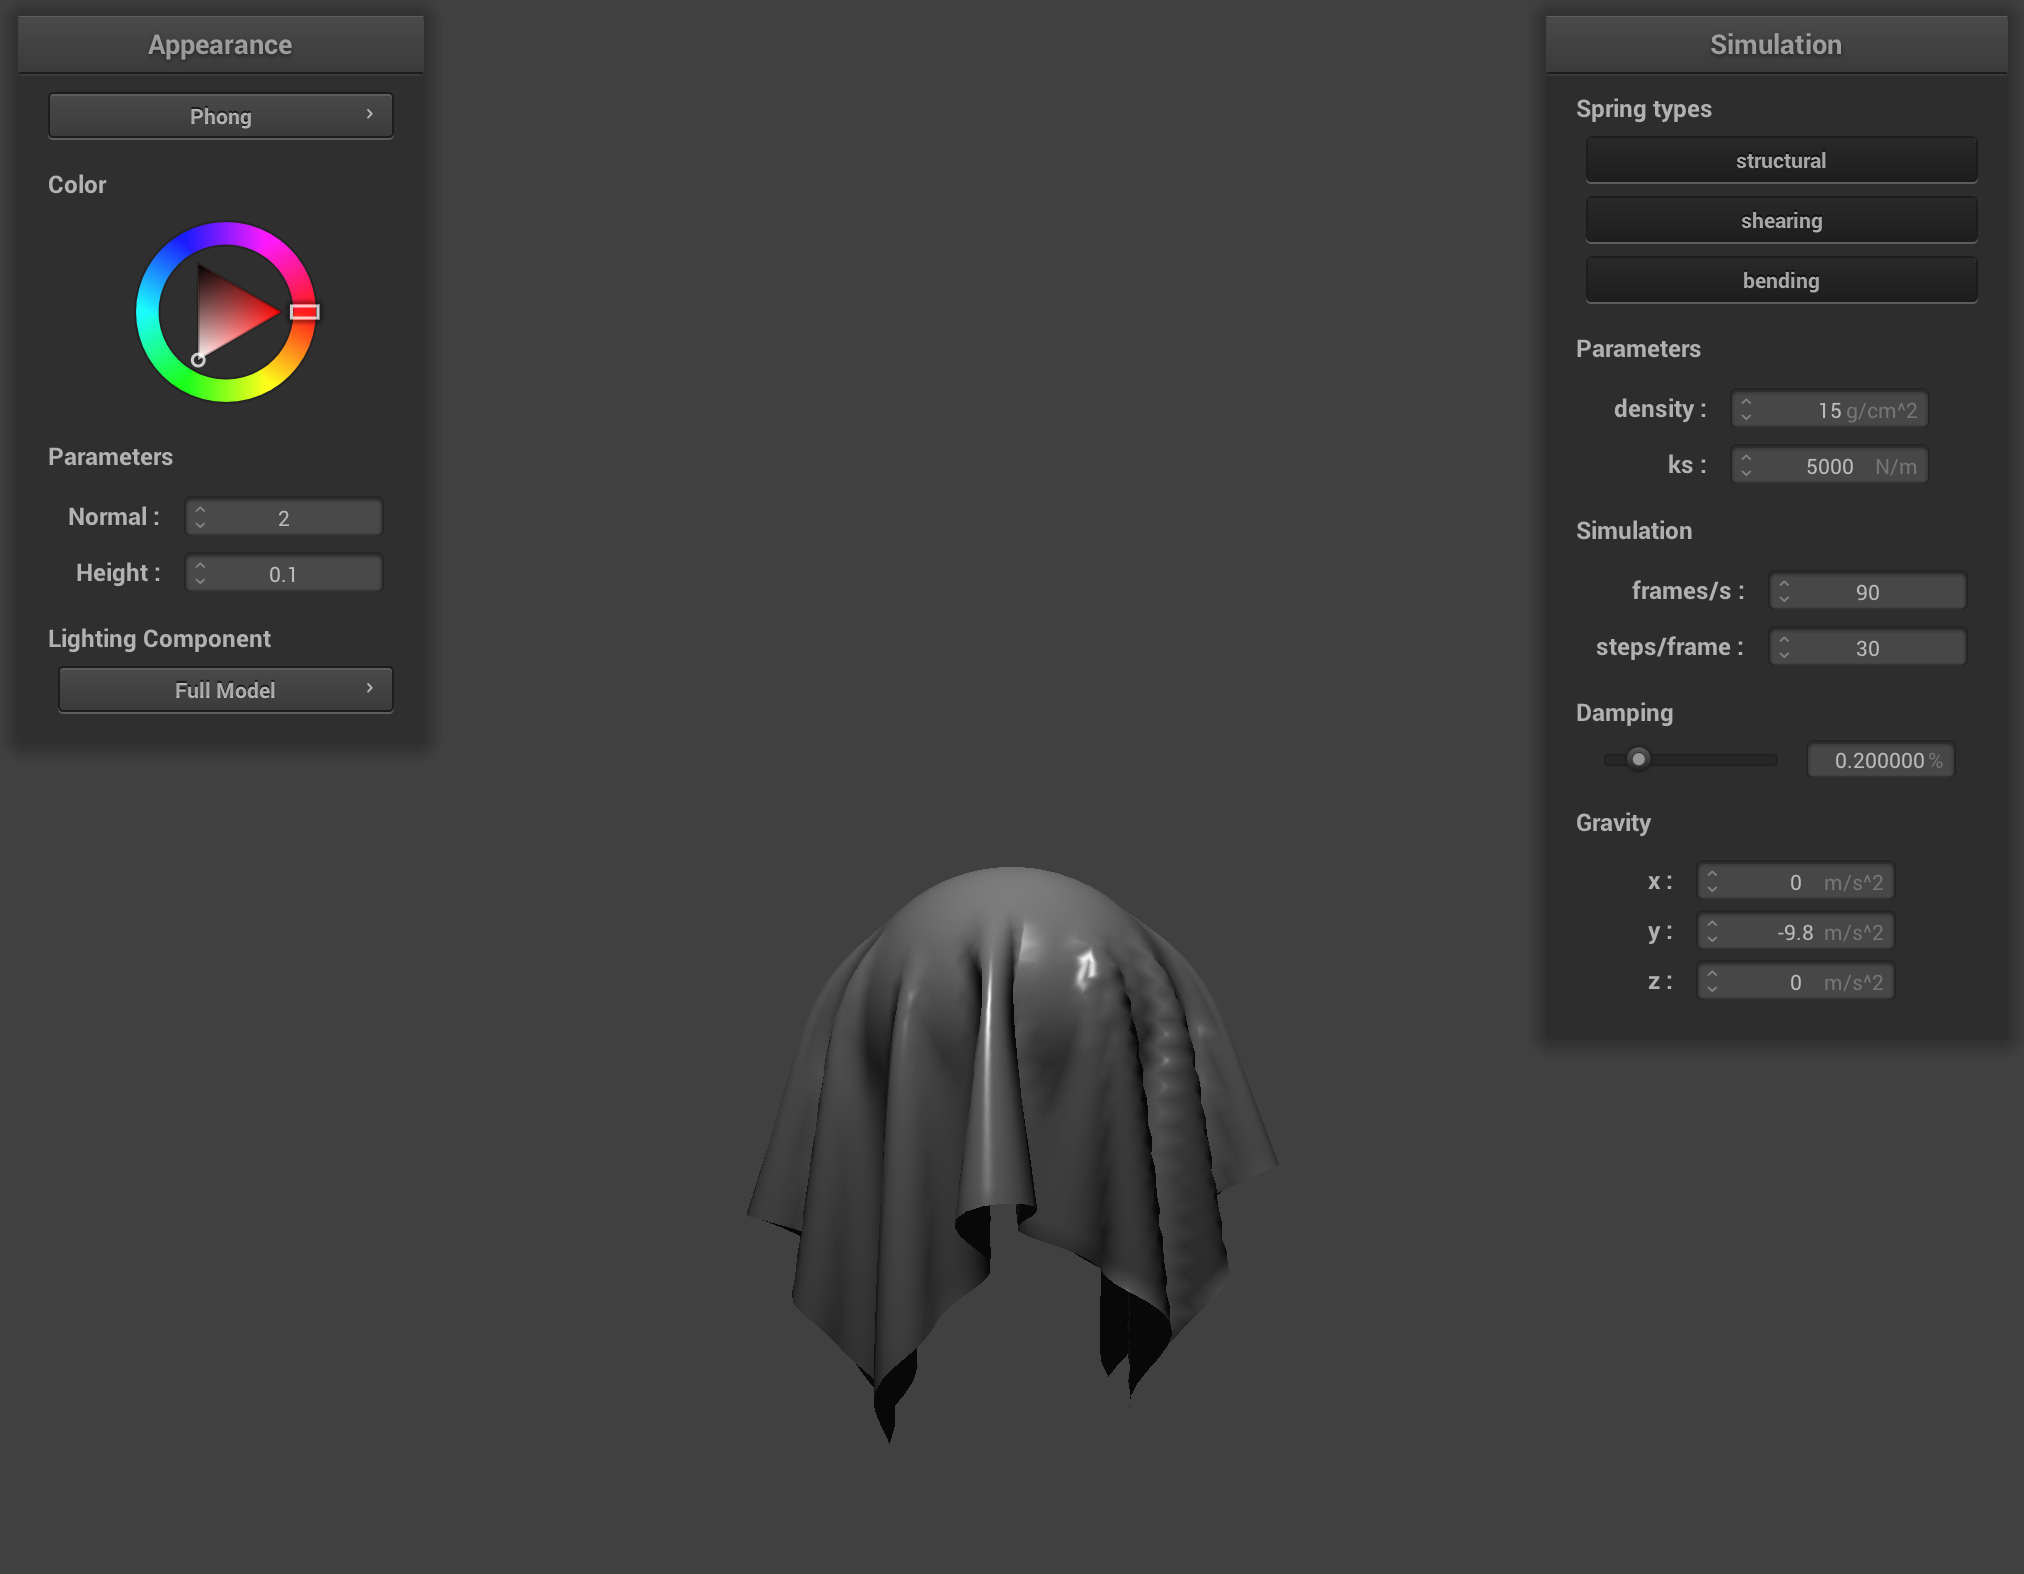
2. Explain the Blinn-Phong shading model in your own words. Show a screenshot of your Blinn-Phong shader outputting only the ambient component, a screen shot only outputting the diffuse component, a screen shot only outputting the specular component, and one using the entire Blinn-Phong model.
The Blinn-Phong shading model calculates lighting by combining three components: ambient lighting, diffuse lighting, and specular lighting. Ambient lighting is a constant illumination representing indirect light bouncing throughout the scene, ensuring objects are never completely dark.
Diffuse lighting represents light reflecting equally in all directions from rough surfaces. It's calculated using the dot product between the surface normal and light direction vectors, producing a soft gradient based on surface orientation.
Specular lighting creates highlights on shiny surfaces by using the halfway vector between the view direction and light direction. The specular power parameter controls the size and sharpness of these highlights.
Each component has separate coefficients (ka, kd, ks) that control their contribution to the final color, allowing for different material appearances.
Ambient Only
Diffuse Only
Specular Only
Full Blinn-Phong
3. Show a screenshot of your texture mapping shader using your own custom texture by modifying the textures in /textures/.
Custom Texture
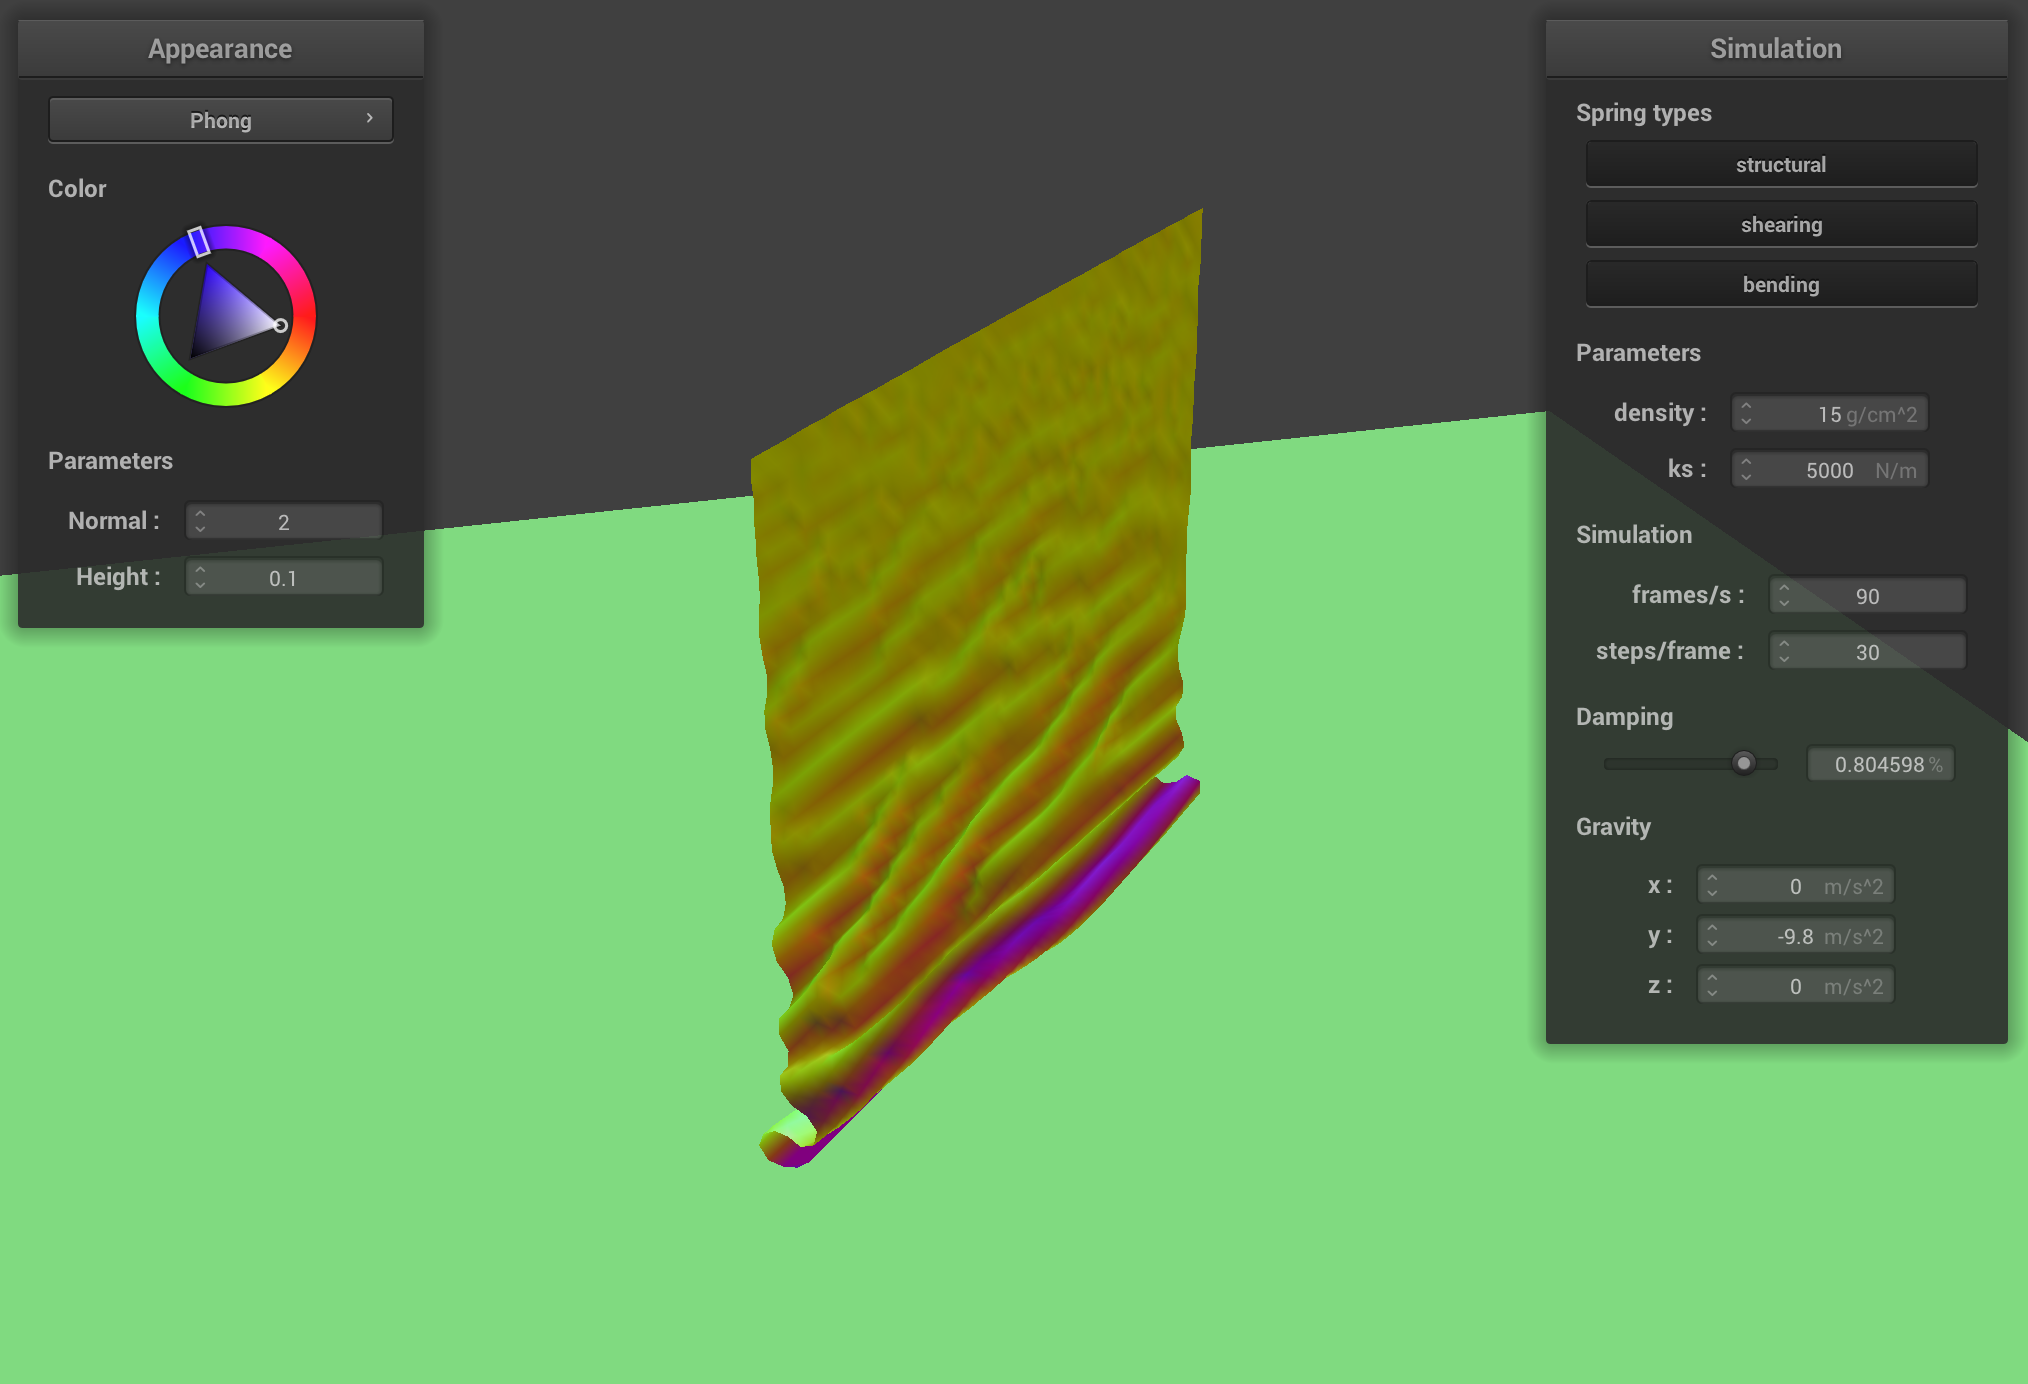
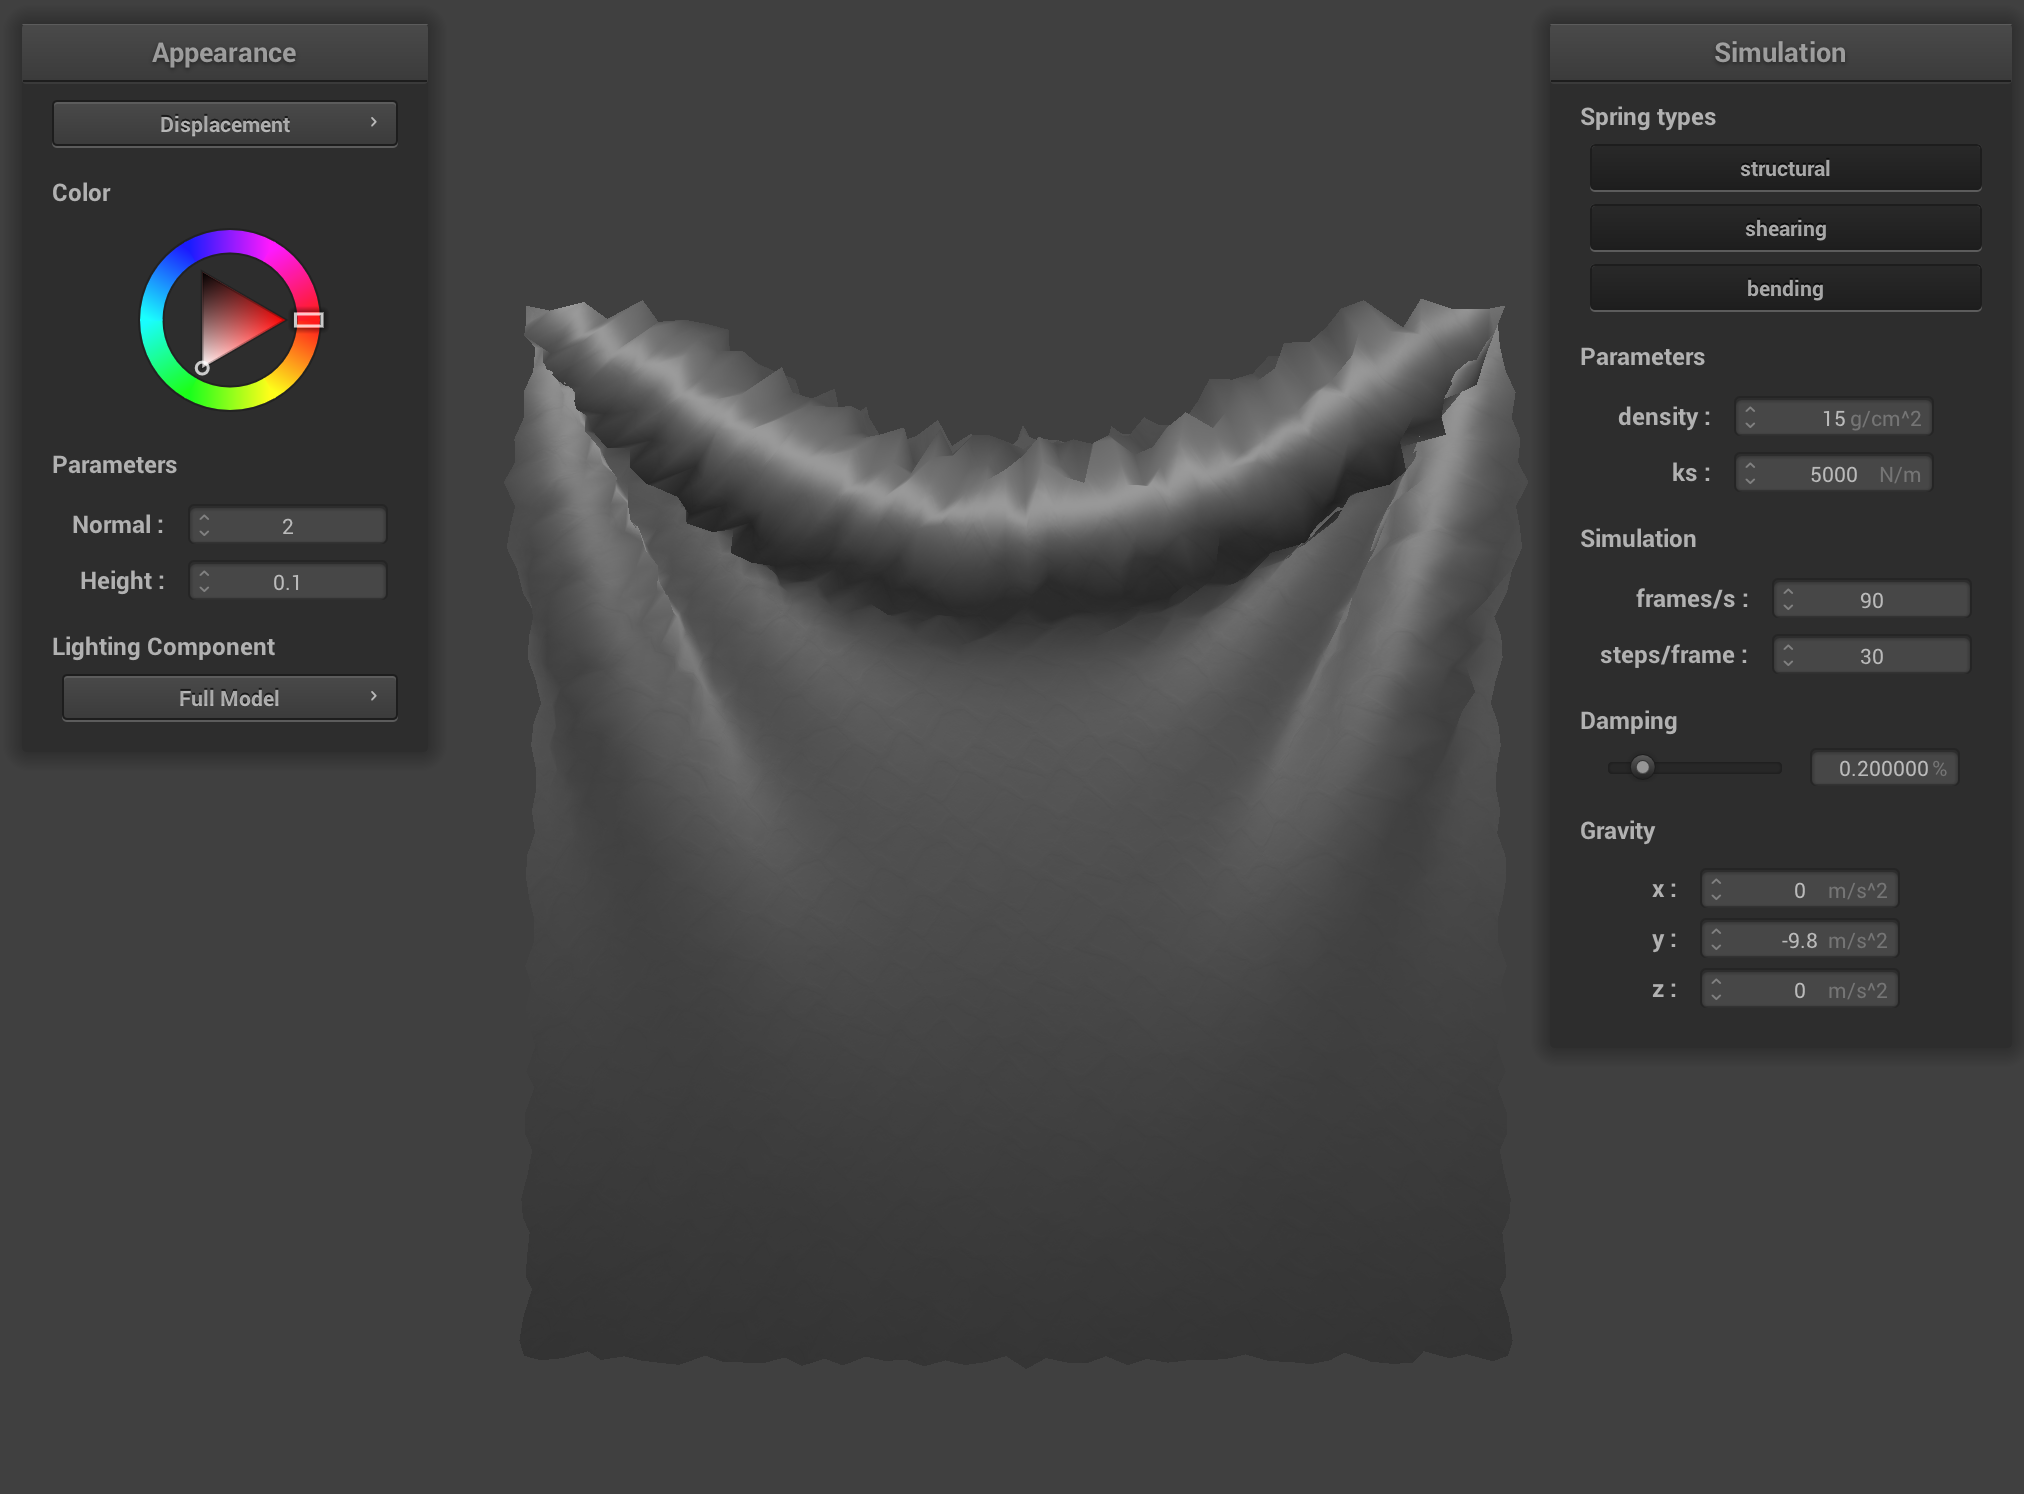
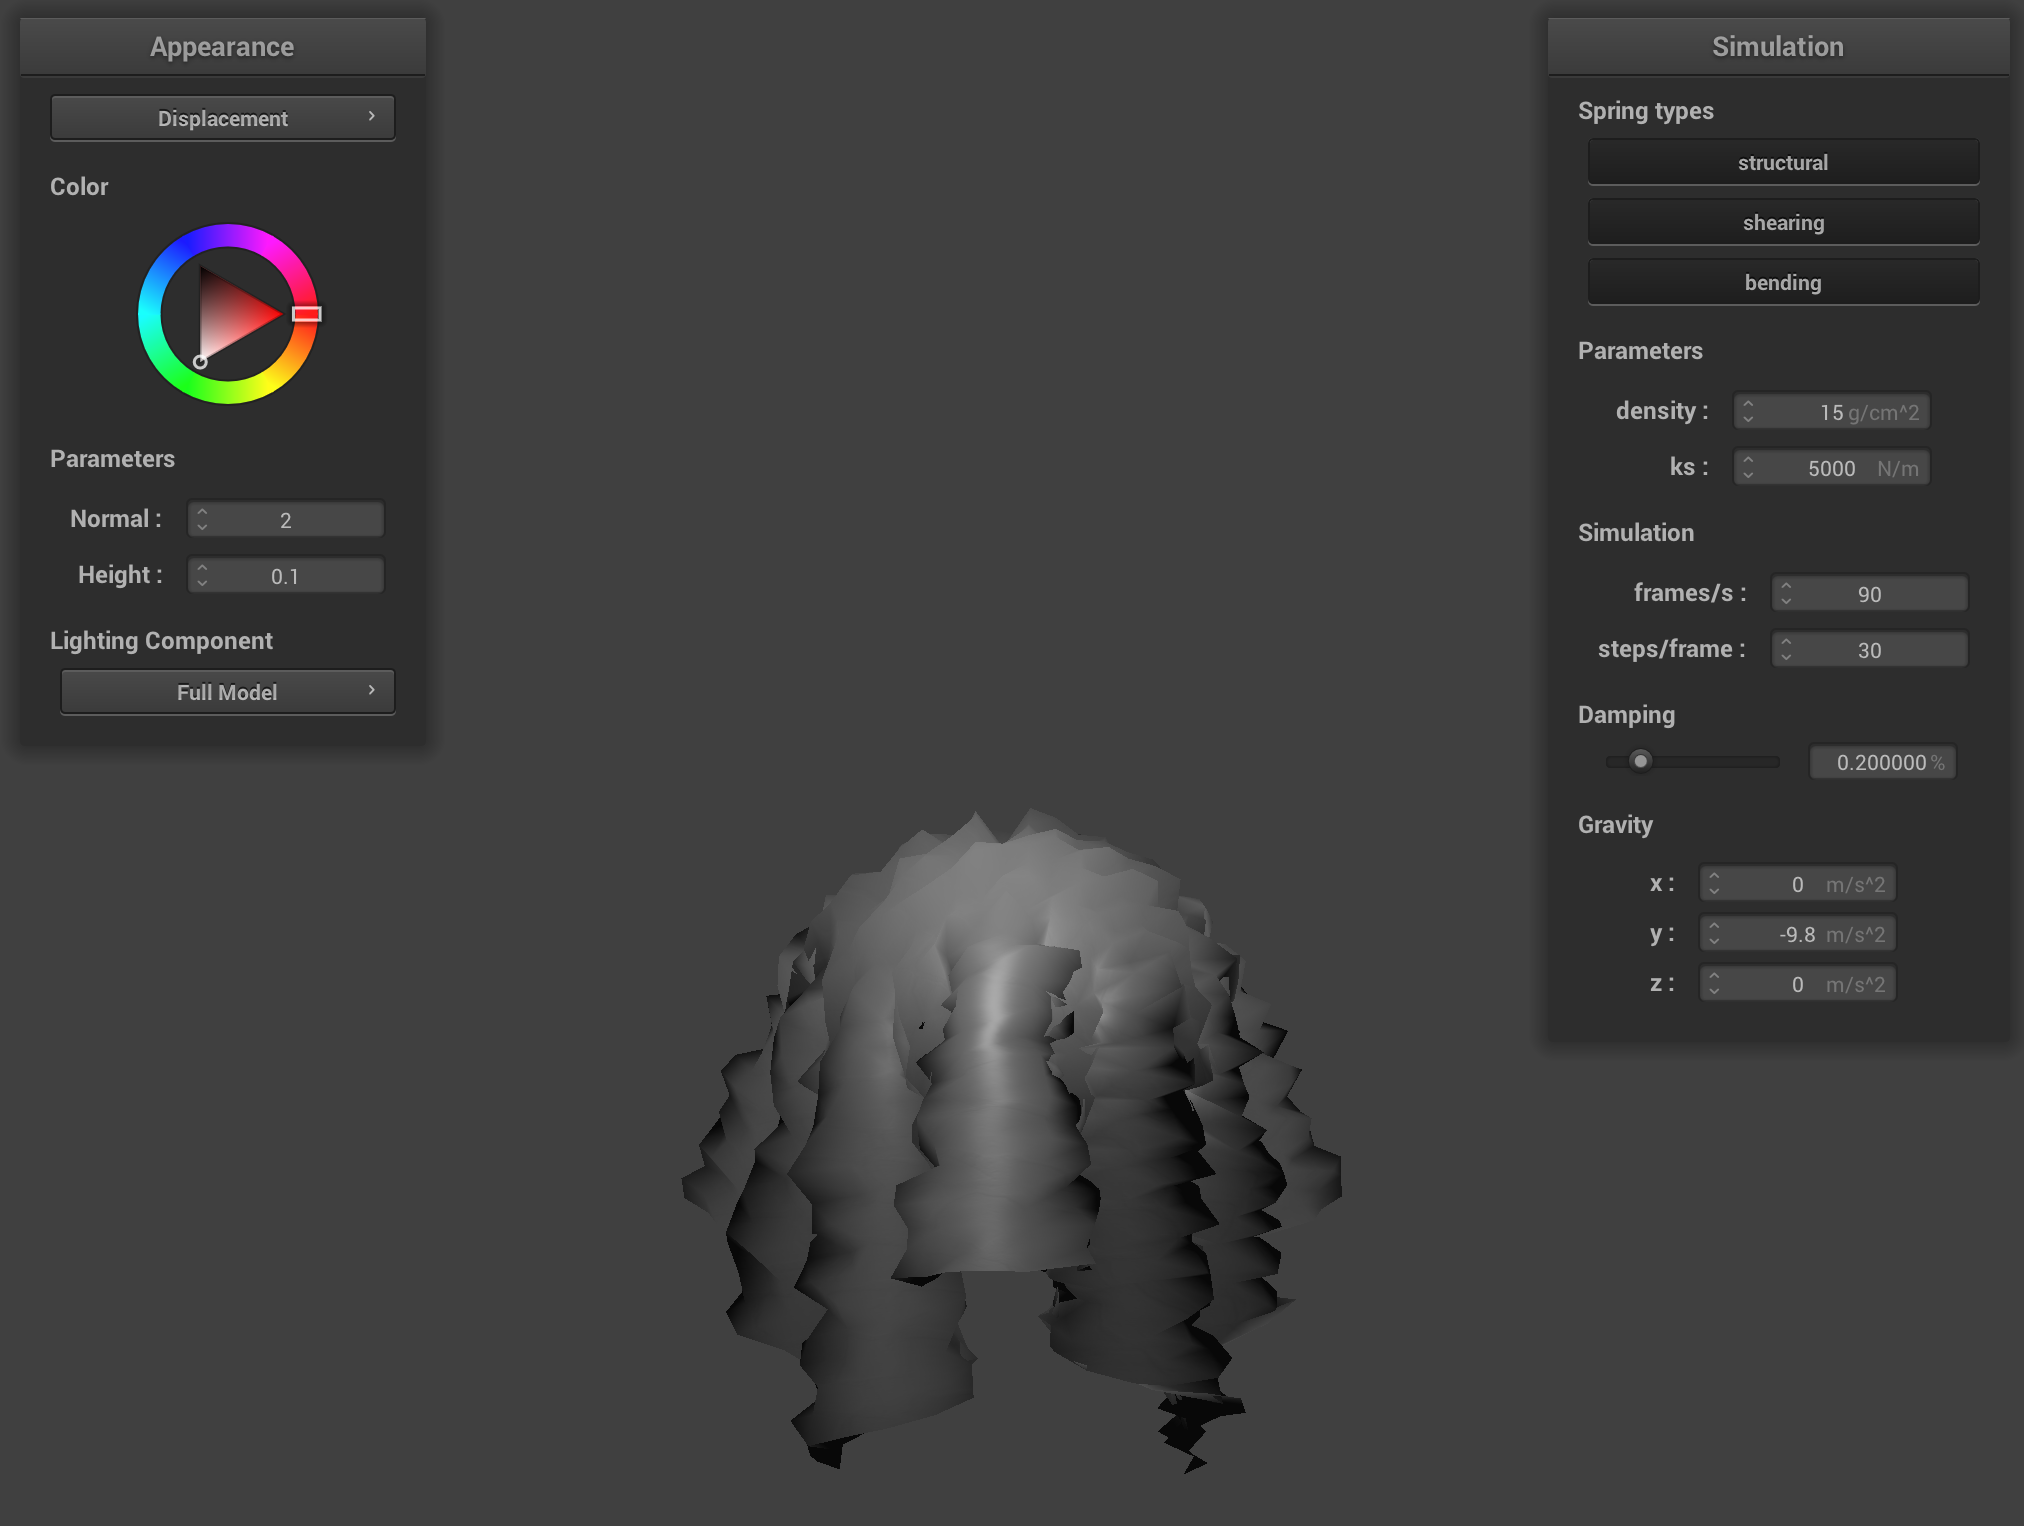
4. Show a screenshot of bump mapping on the cloth and on the sphere. Show a screenshot of displacement mapping on the sphere. Use the same texture for both renders. You can either provide your own texture or use one of the ones in the textures directory, BUT choose one that's not the default texture_2.png. Compare the two approaches and resulting renders in your own words. Compare how your the two shaders react to the sphere by changing the sphere mesh's coarseness by using -o 16 -a 16 and then -o 128 -a 128.
Bump mapping creates the illusion of surface detail by altering normal vectors without changing geometry, resulting in textures that are convincing from direct angles but its limitations can be seen with silhouettes and at extreme angles. Displacement mapping physically alters the mesh geometry to create surfaces, producing more realistic results from all angles. But this requires higher polygon counts to effectively represent fine details.
Displacement on Cloth
Displacement on Sphere
A coarse 16×16 cloth
A fine 128×128 cloth:
A coarse 16×16 sphere
A fine 128×128 sphere:
5. Show a screenshot of your mirror shader on the cloth and on the sphere.